Turkish Food Recipe

Leave a comment

Casserole of Roasted Eggplant and Chicken

(Firinda Kozlenmis Patlicanli Tavuk)

Ingredients:

1/2 pound chicken breast cubed

2 large eggplants

3 garlic cloves

4 ounces sliced mushrooms

1/2 whole milk or cream, or a mixture

Salt

Pepper

1 stick of cinnamon

3/4 cup Turkish cheese (Kashar, or Mozzarella) shredded

FirindaKozlenmisPatlicanliTavuk

Directions:

Roast the eggplants by putting them on a tray in a 400º oven.  Be sure to perforate the eggplants with a fork and make holes for the steam to escape while they roast for 2

5-30 minutes till softened and charred.  Then peel and remove seeds if needed and put in a colander to drain.  Dice the roasted eggplant and

put in a greased oven casserole dish (not too large), and season with salt and pepper.

Sauté the cubed chicken in a skillet in 3 tablespoons of olive oil and the cinnamon stick  till chicken cubes are white but still tender.  Do not brown. Then, add the garlic and sliced mushrooms till softened and the water is reduced out. Add the milk and season with salt and pepper. Remove cinnamon stick and add chicken to the eggplant in the casserole. Sprinkle the cheese on the top.

Return dish to oven and bake about 20-25 minutes until cheese is bubbling and golden. Excellent served with a side of rice.

SUGGESTED VARIATIONS: If you wish, you can halve the roasted eggplants and stuff the chicken and mushrooms inside each half and top with cheese.  Feel free to add other vegetables while you sauté the mushrooms– such as red peppers, or cooked okra, or zucchini. Experiment with seasonings such as sumac and cumin and oregano, too.

Chicken and Andouille Sausage Étouffee

Leave a comment

Spicy, smoked andouille sausage, the hallmark of Cajun cooking, is a star in this  recipe for an étouffee with chicken and features the best of several recipes I’ve been collecting for a while.  This stove top preparation is done all in one pot.

chickandouillegumbo

 I include tomatoes in this dish, but some versions do not.  It serves 4-6 people and is not difficult to make.  The hardest part is waiting for the dish to braise to perfection for 1 hour.  The perfume while it cooks will transport you directly to New Orleans.

Screen Shot 2013-02-03 at 4.25.18 PM

INGREDIENTS:

1 chopped shallot

3 chopped green onions and

chopped parsley for garnish

4 garlic cloves finely minced

1 chopped onion

1 chopped green pepper

3 stalks of celery

3 tablespoons butter

1/2 cup all purpose flour (or more if needed)

2 tablespoons olive oil

5 cups chicken stock (or low sodium broth)

2 bay leaves

1 1/2 tablespoon paprika

1/8 teaspoon cayenne

1 dash tabasco sauce

1 8-ounce can of diced tomatoes

olive oil

5 chicken legs

3/4 pound links andouille sausage

salt and pepper

1/2 teaspoon Cajun Spice mix (optional)

DIRECTIONS:

In a heavy bottomed, large enameled pot or Dutch oven set at medium high heat, add the oil.  Brown the sausage (thumb-sized links) a bit to get some of the fat into the pan, and turn the heat down to medium.  Remove and drain. Then add the chicken legs, generously seasoned with salt and pepper and cook till browned on both sides and drain.

Next, prepare the roux by adding the butter to the sausage and chicken fat followed by the flour.  Combine and stir constantly until a deep brown color is achieved, around 10-12  minutes. (Do not burn. Be patient.)

Add the chopped onion, pepper, celery and garlic and cook till the vegetables soften a bit.  Let the vegetables sweat. Then add the tomatoes and stir up all the good bits.  Next add in the chicken broth and season with cayenne, tabasco, and paprika ( and Cajun spice mix if desired).   Add the bay leaves.

Put the chicken back into the pot and cook covered for about 50-60 minutes until the  meat starts to fall off the bone.

Cut the sausage into thumb-sized pieces and take chicken off the bone.  Add the meats back to the pot, and let work in the pot another 10 minutes to combine flavors and reheat.

Serve in large soup bowls and garnish with the green onions and parsley.

MardiGrasBashMural_kcaulk_2009

New Orleans Classic Gumbos and Soups

Leave a comment

By Kit Wohl

(Photos also by Kit Wohl)

Seafood Okra Gumbo Classique

Frank Davis (New Orleans television personality and cookbook author) shared this recipe with Wohl.  

Untitled

Note:  For a successful gumbo preparation, Wohl suggests that the cook assemble all the ingredients first for ‘mise en place’ ease of cooking.  Also, be sure you start with a very large pot that holds at least 10 quarts.  You’re cooking New Orleans style now!

SERVES 12-18

INGREDIENTS:

12 Tablespoons vegetable oil, divided

1 pound smoked sausage, diced

4 16-ounce cans sliced okra or 4 10-ounce packages of sliced frozen okra

2 gallons water or seafood stock, divided

2 sticks corn-oil margarine

6 Tablespoons all purpose flour

3 large white onions, finely chopped

3 teaspoons garlic powder

2 Tablespoons liquid crab boil seasoning

3 teaspoons fresh thyme, chopped

2 pounds shrimp, shelled and chopped

8 1.25 ounce packages of sun-dried shrimp, optional

1 pound fresh crab meat

12 raw gumbo crabs (small hard-shell crabs) cleaned/quartered

1 16-ounce can tomato sauce

8 whole bay leaves

1/2 cup parsley, finely chopped

2 Tablespoons kosher or sea salt

3 pounds shrimp, whole and raw

4 cups cooked rice

Place 6 tablespoons of the vegetable oil in the pot over high heat. Add the smoked sausage and brown well. The fat will be the base for browning the okra.  Reduce the heat to medium. Add the okra to the sausage and also brown it well.  It should cook in about 20 minutes. Pour in 1 quart of water and let the contents simmer, covered, on low heat.

In a small saucepan, begin preparing a brown roux. Place the remaining 6 tablespoons of vegetable oil, the 2 sticks of margarine and the 6 tablespoons of flour and cook until the flour turns brown. Add the onions, garlic powder, liquid crab boil seasoning and the thyme and stir briskly until the onions become tender and translucent.  Add the roux mixture to the okra in the large pot and blend together well. Add the remaining 7 quarts of water, increasing the heat level to medium-high and bring to a simmer. Reduce heat to low and allow the liquid to simmer for about 10 minutes, stirring constantly.

Set the whole raw shrimp aside and add the chopped shrimp, sun-dried shrimp (if using), crab meat, gumbo crabs, tomato sauce, seasonings, and stir.  The gumbo liquid should be brownish with a reddish tinge, and the okra should be broken up and suspended in the liquid. Cover the pot and simmer on low heat for about 25-30 minutes, stirring occasionally.

Then uncover the pot and add the 3 pounds of whole shrimp. Cook on high for about 5 minutes. When the shrimp are done, take the pot off the fire and set it aside, but leave the cover on for 20 more minutes. This will allow the seasonings to blend fully.

Finally, after the gumbo has cooled slightly, toss in the steamed rice and stir it in well.  Once again, cover the pot and let the rice grains soften for at least 40 inutes to pick up the flavors.  Freeze any leftovers.

(Leftovers?  Dream on. This recipe is pure delight and fit for a Mardi Gras king and his court.  There won’t be a drop left.)

mardis gras king copy

Julienned Veggie Pasta With Pesto

Leave a comment

Here is a recipe inspired by my vegetable peeler!  

This dish contains no pasta and is fun to make when you use the peeler that juliennes vegetables

INGREDIENTS:

One of each (medium size) for julienne:   Zucchini, Carrot, Summer Squash, Sweet Potato (peeled)

1/2 cup chopped onion

2 cloves of chopped garlic

3 Tablespoons olive oil (and more for garnish)

salt and pepper

1/4 cup fresh basil

1/4 cup of your favorite pesto.

1 pint roasted grape tomatoes (or seasonal garden tomatoes if available)

parmesan cheese
4609912280_b5baf63e1a

DIRECTIONS:

Toss tomatoes in 1 tablespoon olive and season with salt and pepper. Roast on flat pan in 400 degree oven for about 30 minutes until lightly caramelized for taste to intensify.

Julienne the zucchini, carrot, summer squash, and peeled sweet potato.

In a large skillet, add 2 tablespoons of  olive oil. When hot, add chopped onion and stir till just softened.  Add sweet potato and soften (but do not brown).

Add garlic and stir till softened.  Then add the julienned strips of all the remaining veggies.  Stir until softened, but not browned.

Add roasted tomatoes and stir gently.

Remove from heat.  Add pesto and combine.  Transfer to large serving bowl. Salt and pepper if needed.  Add fresh basil leaves as garnish and some parmesan cheese.  Drizzle with more olive oil if desired.

.


Steak Diane

Leave a comment
Tina Rosser  shared  this humorous essay  with OTK last week.  I thought you would enjoy it, along with a copy of Pierre Franey’s recipe for Steak Diane.             –MELorden

STEAK DIANE:  An Elusive Recipe

by Tina Rosser

a-koenig-diane

For years I’ve craved a good steak Diane.  What, you may ask, is Steak Diane?  Well, if you know what it is then you are well past your Use By date, but for the rest of you young ‘uns, Steak Diane is a mighty fine piece of meat pounded into oblivion and then sautéed quickly with butter, chives, cognac and a couple of other ingredients.  It was a big deal in restaurants back in the 40’s and 50’s but is now next to impossible to find on any menu.  And if you happen upon a willing chef, the version you’ll get will probably be nothing like what was being served way back when.

I first sampled Steak Diane in a restaurant outside Baltimore somewhere around 1973 or so.  Wealthy boyfriend’s parents were in town which was the only reason I got near that particular restaurant. Since that singular tasting is what I measure all Steak Dianes against, perhaps I too, like those willing chefs, am all wet when it comes to how this dish is supposed to taste.  For years after that one sublime tasting, I searched for a good restaurant Steak Diane.  Sometimes it would appear on a menu and often it seemed that the chef just took a not so fine piece of meat and smothered it in a mixture of A-One Sauce and Worcestershire Sauce.  Not okay.  Once or twice I happened upon a chef who was willing to knock out his version of the dish at which point I would have to swoon and greatly appreciate something that may have been good but was NOT Steak Diane.

Then, during a dalliance with the Book of the Month Club (remember them?), I stumbled upon Pierre Franey’s 60-Minute Gourmet cookbook.  And lo….there it was…a recipe for Steak Diane.  So one evening I decided to try out this recipe and after getting a boatload of flak from the butcher for asking him to pound thin a lovely filet, I managed to gather the rest of the ingredients and whattayaknow!  Presto Change-o! Voila!  Steak Diane as I remembered it!

tumblr_lohbedhw8s1qkkjz3

Fast forward about thirty years (where did the time go???) and here I am ensconced in my little Upper West Side apartment with a kitchen the size of a stick of butter and one cold winter night I get this bee in my bonnet about recreating that Pierre Franey recipe.  When I moved here from Connecticut, I brought along six cookbooks….Julia didn’t make the cut, but Pierre did.  So I hauled out the book and went off looking for the ingredients.  And what did I discover about New York City?  Butchers are rare!!!!!  I went to the Korean market….all the fish you could ever eat….I went to Zabar’s…ditto on the fish along with orange juice to die for…..but not a butcher to be seen.  So,  home I trudged with my shallots and chives and boullion and imported mustard and little tiny bottle of cognac, and after stopping at a Mickey D’s to drown my sorrows in a truly predictable burger and fries (oh hush up….you’re going to tell me you never go slumming at Mickey D’s???) I put all my ingredients away with the intention of finding that steak in the next day or so.

COU0010203But things happen.  Dinner with a friend, a jaunt to Connecticut, a birthday dinner, another dinner with a friend or the kids, and on and on.  So now I have shriveled parsley and chives and a mushy shallot.  The cognac even went into a tea concoction to battle a cold.

Another week goes by.  The temps are hovering in the sub-zero range and I decide I’m required to go out and walk for an hour after which I’m going to run into Fairway and get a nice little roasted bird which I will slice up and throw into a giant dinner salad.  And as I’m walking along in Riverside Park getting frozen to death, that Steak Diane recipe hops into my frontal lobe and knocks out the chicken and salad.  Into Fairway I go and gather up all the ingredients.  My last stop is the butcher who nearly has a coronary when I ask him to pound a beef filet down to about a quarter inch thickness.  I escape the judgement of the Fairway staff, run into a liquor store for a wee bit of cognac and get home where I roll up my sleeves and prepare everything exactly to Pierre’s specifications. Sort of.

It was good.  Pounding that filet sure makes it easy to cook.  Sort of like a fish fillet.  Two minutes a side and it’s perfect.  But it still wasn’t the Steak Diane I remember…..now elevated to epic status and perhaps not remotely achievable.  I did mess with Pierre’s ingredients a bit.  I had half the steak called for in the recipe but used the full amount of oil and butter, parsley and chives.  I went a little shorter on the boullion, cognac, mustard and Worcestershire. With a baked potato (smothered in more butter) and a lovely salad it made for a great dinner.  And I probably would have considered it perfect if not for the memory of that Steak Diane I had so long ago in a restaurant in Baltimore.

So what’s next?  I’m going to keep trying until I get it right.  A little less oil, a little more cognac, more shallots and less chives?  Whatever it takes.  And the perk?  I have a terrific recipe for steak that will thrill all my carnivorous family and friends none of whom are looking for the elusive Steak Diane that I will continue to attempt.  So they win, Pierre gets a workout, and maybe, just maybe, someday soon I’ll get it right.

RECIPE  FOR  STEAK DIANE  (from Pierre Franey, 60 Minute Gourmet)

INGREDIENTS

4 filet mignon, about 6 ounces each; or 4 boneless sirloins

salt and pepper

2 T olive oil

3 T butter

3 T chopped chives OR shallots

2 T cognac

3 T chopped parsley

1 teas. imported mustard

1/2 teas. Worcestershire sauce

2 teas. fresh or canned broth, preferably beef although chicken can be used.

DIRECTIONS

Pound meat to 1/4″ thickness.  Sprinkle both sides with salt and pepper.

Heat 2 T of oil and 2 T of butter in a large skillet and when very hot, add two of the steaks.  1-1/2 minutes on one side, 30 seconds on the other (not long enough for my tastes).  Transfer to a hot serving dish and then do the other two.

Remove skillet from heat and add the chives.  Return skillet to stove and cook about 10 seconds.  Add the cognac and stir.  Add parsley, mustard and Worcestershire.  Add the broth and stir.  Swirl in remaining butter.  Sprinkle the steaks with s and p and pour the sauce over them.

(For more about the history and technique of preparing this dish:   STEAK DIANE: LOST FOODS OF NEW YORK)

Baking with Grandma Duck

2 Comments

Baking with Grandma Duck:  Apple Cakenonnapapera

An Italian interpretation of Nonna Papera’s apple pie is translated here below by the wonderful Francine Segan (Dolci: Italy’s Sweets). Francine has been a major fan of  Grandma Duck’s manuale of recipes since childhood, and now she has written a few of her own.  One of her favorites, and certain to be one of yours, is this rich and simple-to-make apple cake.  If you put it on your window sill to cool, attenzione!  It might just disappear.

NOTE:  Click on the sidebar menu under RECIPES for more cooking with Disney!

2011-10-28-DolciCovercrop.jpg

photo by Ellen Silverman

Pareva la torta di Nonna Papera!
Looks like Grandma Duck’s cake!
Said of a particularly pretty cake or pie

A classic! At first glance it may seem like a huge ratio of apple to dough and you’re going to be tempted to cut down on the apples. Don’t! It looks like a lot of apples, but they magically meld into the batter. You’ll love the result. The top half of the cake is chock full of tender apples that float over sweet moist cake.
Deceptively simple, exceptional results.

Ingredients:

2 tablespoons olive oil or butter, plus more for the pan
7 ounces, about 1 1/3 cups, whole wheat or all-purpose flour, plus more for the pan
2/3 cup, plus 1 tablespoon, granulated sugar
2 large eggs or egg substitute
1/2 cup whole milk
2 teaspoons baking powder
1 teaspoon baking soda
Zest of 1 lemon
4 large or 5 medium apples, about 2 pounds total

Preparation
:
Preheat the oven to 350 degrees.
Butter and flour an 8-inch cake pan. Beat 2/3 cup of sugar and the eggs in a large bowl, using a whisk or electric handheld beater, until creamy and light yellow. Beat in the flour, milk, baking powder, baking soda and zest. Pour the mixture into the prepared pan.

Peel and core each of the apples. Dice one of the apples and stir the dices into the batter. Cut the remaining apples into thin slices. Spread the slices over the diced apples in the pan in a neat pattern. Press into the batter. Scatter thin pats of butter or drizzle olive oil over the apples and sprinkle with the remaining tablespoon of sugar. Bake for about 75 minutes, until dark golden and cooked through.

Flora’s Fudge

18 Comments

Disney Characters in the Kitchen:  Revisiting A Childhood Recipe

The Fantasy Behind Flora’s Fudge:  Almost As Easy As Magic  (SEE FOLLOW UP NOTE AT BOTTOM OF THIS POST)

I have spent decades yearning for a slice of fudge.  Not just any fudge.  I’ve wanted a hunka hunka burnin’ chocolate nut fudge that I made as a child on a snowy afternoon with my father and sister.  But the recipe was parts unknown, and I only held a faded memory of the comical source of that wondrous fudge recipe.

It was 1959, and I was in a dream world having just seen Disney’s now classic animated film, Sleeping Beauty.  This obsession with medieval castles, a trio of fairy godmothers, and a prince of my own would eventually be eclipsed by a different Disney obsession with Peter Pan, the pirate-loving fella who could fly and preferred to hang out on an island with a team of really cool and furry friends. (I never understood that simpering Wendy.)

At about the same time that I was encountering these Disney role models, I became enamored with cooking with my father.  He loved to cook, and it was obvious in his joy over the stove when he boiled shrimp and stirred cocktail sauce to go with his highballs, much to my mother’s chagrin.  There were his amazing pancakes, eggs, bacon, and all manner of breakfast food.  “I could eat breakfast every meal,” he said.  And sometimes we did.  Having grown up in and around his parents’ bakery and then general store, Daddy was full of food stories about loading and butchering meat, stealing from the pickle barrel, and (my favorite) filling jelly donuts.

Sunday mornings we picked up the newspaper at the local journal joint on Pleasant Street.  The owner was a big cigar smoker and looked like a villain straight from Marvel comics, which he sold racks of.  I liked looking at the comic books (which oddly were displayed near all the dirty magazines). There, that Sunday, in the more PG of the spinning racks, I saw a shiny comic depicting Sleeping Beauty’s own private team of wish-grantors– those  pink, blue, and green Fairy Godmothers.  This comic book was our Sunday morning treat, and soon my sister and I lapped up all the silly adventures of the winged and glittering Flora, Fauna, and Merryweather.  But the added joy was on the back page of the issue where we discovered a recipe, written in a rebus code, called “Flora’s Fudge.”

4color984fairy-godmothers-f

That afternoon, we convinced our father to create what was sure to be a magical confection in our own kitchen. We decoded the recipe together and followed the directions. It was made in a saucepan, and the comic book image of the pot showed a small saucepan shaped like one we owned. For years, every time we made the fudge, about halfway through the recipe, we transferred the melted base into a mixing bowl to add all the confectioner’s sugar and chopped nuts. Within moments of adding the sugar, and nuts, the fudge became impossible to stir.

Of course, I believed, it never would have been a problem for Flora, the fairy godmother.  All she needed was a flick of her magic wand to transform the ingredients into fabulous fudge. Only our father’s brute force could maneuver the spatula enough to combine the ingredients, and I remember looking forward to and giggling at the funny faces he made in the effort. Our father was great in a pinch.

What follows is the exact recipe for Flora’s Fudge from the vintage comic.  After 50 years of wondering, and a few wild goose chases, I finally tracked down the very comic of my youth on e-Bay. I mistakenly had been hunting for the Sleeping Beauty comic and not The Fairy Godmothers issue. 

Even though I found a posting of the recipe itself on-line, it would not do. I had to have that illustrated rebus in my hands. I had to know if it was really as good and still as hard to stir as I remembered. My imagined solution, then, is to begin with a larger pot to accommodate all the powdered sugar, keep it on the burner at low, and see if this makes a difference in the effort required to combine all the ingredients;

Let’s test my hypothesis.  

4color984fairy-godmothers-b

The Process:

All ingredients assembled. Chocolate selected was 100% Cacao unsweetened chocolate bar by Hershey.

Then I thought that a deep, non-stick  soup pot was a sure bet for handling the large amount of sugar and would prevent any chance of burning. I actually had a roll of wax paper on hand– shades of the fifties when mom wrapped my sandwiches with it for school lunch.

Butter and chocolate melted nicely,  Some panic set in when adding the egg right into the pot– what if it scrambled?  Use a whisk and then spatula and take it off the heat for a moment when adding the egg. Then add vanilla. The liquids kept the mass moving easily.

Then it was time for half of the confectioner’s sugar–  things started to seize up and turn to oatmeal consistency.  A continuous mixing seemed to soften the combination, and it accepted the nuts easily.

Adding the second half of the sugar required patient stirring for it to combine , but the stirring was not sticky or stiff as I remember it.  Everything was sliding around the pan nicely…

So it was time to dump it into the glass dish and ready it for the fridge.

It had only a moderate sheen and did not stick to together the way I remembered it. It came out rather grainy.  Why…..?  In retrospect, I made errors:

1)  I am not sure I would use the same unsweetened chocolate I did.  It was Hersheys.  I chose it because it seemed like what we might have used then, but next time I will try Bakers Chocolate.  It just seemed to not have enough fat or cocoa butter in it.

2) I will not use a non-stick pan. I’m going for my mom’s old Revere Ware. The non-stick pot never seemed to heat up correctly on the sides, it was too wide, and it may have created sugar crystals. I beat the fudge before it cooled sufficiently which affected the crystals.

(So, what we did long ago with my father when we transferred the hot mess to a mixing bowl to add the sugar may have been the right step to take in retrospect.)

3)  I think that I stirred the butter too much. It should just melt into the chocolate on its own to avoid separating the water and fat in it.

The fudge tasted fabulous, but the mouth feel was definitely off.  Why don’t some of you give it a try out there?  OTK would love to know how fabulous was your version of Flora’s Fudge?

~~~~~~~~~~~~~~~~~~~~~~~~~~~~~

FOLLOW UP NOTE:

So 24 hours later, I can say that this first attempt at recreating Flora’s Fudge was a FLOP. But I have not given up and will revisit the recipe in the near future.

Readers out there who know about making candy or working with chocolate might offer up some good advice here. It would be appreciated.

And do let me know,  folks,  if you have tried it, too. The recipe is rather thin on directions, but then again, the comic artists at Disney in1959 were probably not chocolatiers– just Mousketeers.

MOUSEKETEERS6

Cowboy Cooking

2 Comments

BUSTING MYTHS ABOUT FOOD ON THE FRONTIER

Ahh. Nothing like sitting around the campfire under a starry night. You lean up against your saddle, take out your mess kit, and pony up to the old chuck wagon on your tired, bowed legs. You give Cookie a smirk and receive your reward for a rough and tumble day of cow punching–  a rusty ladle of  beans.  Yessiree.

When your team of cattle drovers reaches the nearest town, the cook visits the general store to load up on big burlap bags of more beans, coffee, sugar, flour, and of course, whiskey– the staples of the cowboy diet.  Shades of Blazing Saddles, Rawhide, and John Ford westerns?  Since this image of cowboy fare  is both comical and romanticized, let’s take a look at what really constituted cowboy grub.

cowboy-kitchen-320

Guarding the larder

Cowboy is a catch-all term for those nomadic workhands who herded cattle across the plains of the American west during the mid to late 19th century.  Cattle herding and driving, however, had its American roots among the Irish in Boston in the early 1700′s and then in the grazing culture of the South before it moved westward onto the Great Plains. Cities like Baltimore and Philadelphia certainly enjoyed their cuts of beef as drovers brought cattle to slaughter in the mid-Atlantic states (Weaver, America Eats).  Following  the US government’s mandate to exterminate both Indians and the buffalo after the Civil War, the practice of raising and breeding cattle blossomed along with the conquest of the western plains.  Cattle ranching and husbandry were considered a superior pursuit compared to the hunting and gathering life ways of the indigenous peoples. Infamous cowtowns like Abilene, Wichita, Omaha and Chisolm  through which Texas herders drove their Longhorns emerged. By the mid- 1880′s,  6 million head of cattle  were driven north by cowhands to the railroad hubs en route to Chicago’s  slaughterhouses  (Civetello, Cuisine and Culture).   As the desire for cheap beef grew, laborers on horseback were in great demand.

The cowboy diet was the fare of the working man.  No filet mignon for him.  For the hardscrabble cowboy, the number one concern was a full stomach for the 2 to 5 month drive.  Like most nomads, cowboys carried a lot of their foodstuffs with them in the form of dehydrated beef (jerky) and hardtack, or they were scavengers on the trail. In fact, beef was generally not the central focus since its value was in its sale, and when served, it was often in the form of a stew composed of the less pricey cuts and odd bits– or the “chuck”.

The name “Chuck” derived from 17th Century England…meat merchants who referred to their lower priced goods as “Chuck”.  By the 18th Century, the term “chuck” was communicated towards good hearty food. (Chuckwagon Cooking: History, web)

And it wasn’t until after the Civil War, in 1866, that a clever cattleman by the name of Charles Goodnight transformed an old surplus army wagon into a rolling pantry.  With the addition of a hinged door that flipped into a table, some drawers and shelves inside the wagon bed for canned goods (like tomatoes and peaches for vitamin C to fight scurvy), and a storage boot for pots and pans, the chuck wagon was born. The manufacturer was Studebaker, and the company went on to produce several more sophisticated models.  Who knew that the workhorse larder for the cowpoke was the ancestor of  the four-door sedans of  the mid-twentieth century American family? After the creation of the chuck wagon, cowboys ate measurably better.

Want to learn how to cook like a modern cowboy?  You can go to camp and learn how.  Check out the Kent Rollins’ Dutch Oven Cooking School:

What was the typical day for the chuck wagon master like?  He didn’t just cook.  He cut hair, nursed wounds, did mechanical repairs,and managed accounts along with preparing and rationing  foods: grinding coffee, making biscuits, tending the sourdough starter, and carving the salt pork. His tasks included setting up camp, tending the fire,  preparing meals using dutch ovens and skillets, and cleaning up..  He was paid well for it–  significantly more than the cowboys.

Fresh eggs or vegetables sometimes would be available as the trail boss [would] authorize trading a steer with some farmer along the trail drive… the daily norm was dried pork, beans and bread with the choice of water or coffee to drink. (Chuckwagon Cooking: History, web)

cowboycook

Because the cowboy population was made up of many immigrant cultures, their food reflected the combined and often looked-down-upon culinary habits of the Irish, African, South American, Chinese, and Spanish cultures. Chile was the go-to spice for Cookie. Today when you encounter cookbooks that contain old-timey , genu-ine cowboy recipes, they often reflect the influences of these various cuisines.  You might find some great recipes for Rocky Mountain Oysters (bulls testicles), Sancocho de Cola de Res (Ox tail stew), and all manner of corn biscuits and tortilla-based fare, and the ubiquitous frijoles– yes, beans.

Beware cookbooks that hail authentic cowboy meals in the form of a cast iron skillet Chicken Cordon Bleau or Chicken & Cheese Chimichangas because the real cowboys were having none of that.  Funny now to see how these delicacies rustled up in an old cast iron dutch oven or skillet are considered authentic and iconic cuisine.

Maybe that miserable meal of beans and burnt coffee isn’t so far off the mark after all.  The chuck wagon master probably slept with his Remington by his side many a night after the last tin cup and spider were washed and stored.              –MELorden

RECIPES 

Time to saddle-up and get out the old skillet and give these cowboy victuals a try.  They are sure to put hair on your chest.

For a selection of reinterpreted cowboy recipes, see:          

http://www.recipegoldmine.com/cowboy/cowboy.html

For a look at the more realistic and dismal side of cowboy fare, see:      

 http://www.legendsofamerica.com/we-frontierrecipes.html

http://artofmanliness.com/2009/08/15/cowboys-recipes-thatll-put-hair-on-your-chest/

Fast Flank Steak

Leave a comment

A recent trend in cookbooks is the quick-and-easy, fast-and-simple approach to cooking.  The thirty minute meal is nearly passé as some of the most glamorous chefs in the business are writing accessible, user-friendly, and super speedy recipe books for the home chef.  Popular now is a “1-2-3″ approach and poof!  You have a great meal on the table that is fine enough for entertaining.

So here is a fast and fabulous recipe that I put together in the spirit of “1-2-3″ for a great and versatile cut–  the flank steak.

I wanted to find a way to stop second guessing whether the steak was really done.  In  my early experiences with flank, I was destroying it by over cooking it into a tough, tasteless, and  gray chewfest.  This anxiety about killing the cut eventually led to undercooking it.  The outside looked perfect and the inside remained a very bloody, lukewarm mess. How to know?

The primary objective of the following recipe is not speed, though it does qualify as a 1-2-3 recipe.  I’ve just tweaked the name to 2-2-2 Marinated Flank Steak, and you’ll see why.  It’s easy to remember this recipe as it’s mostly about technique, not ingredients.

In fact, you might be surprised to find out how to get the perfectly seared and moistly cooked marinated flank steak every time.

 RECIPE FOR 2-2-2 MARINATED  FLANK  STEAK

Here’s the basic technique:

–2 hours of marination

–2 minutes in the microwave 

–2 minutes/side in a hot  frying pan

Now before you go all ballistic about the microwave part, keep reading.

MARINADE

Use your favorite marinade recipe.  It doesn’t matter!  Go Asian, Italian, Greek, or Mexican.  They all will work. (OK.  Even bottled will work, though it tends to be higher in sugar and salt, which means the flank might burn more easily at the high temps in the fry pan.)

For this posts’ version, I created my own recipe for an Asian marinade that is easy to remember because it also uses “2″ as its magic number. (See very bottom of this post.)  If you want easy marinade recipes for Greek or Italian, etc, contact me.

Also, you can post your own favorite marinade recipe below in the Replies.  Hungry people want to know!

(See recipe for this Asian marinade at the bottom of this post. Hmm.  Is that  mari-NAID, or mari-NAHHD?)

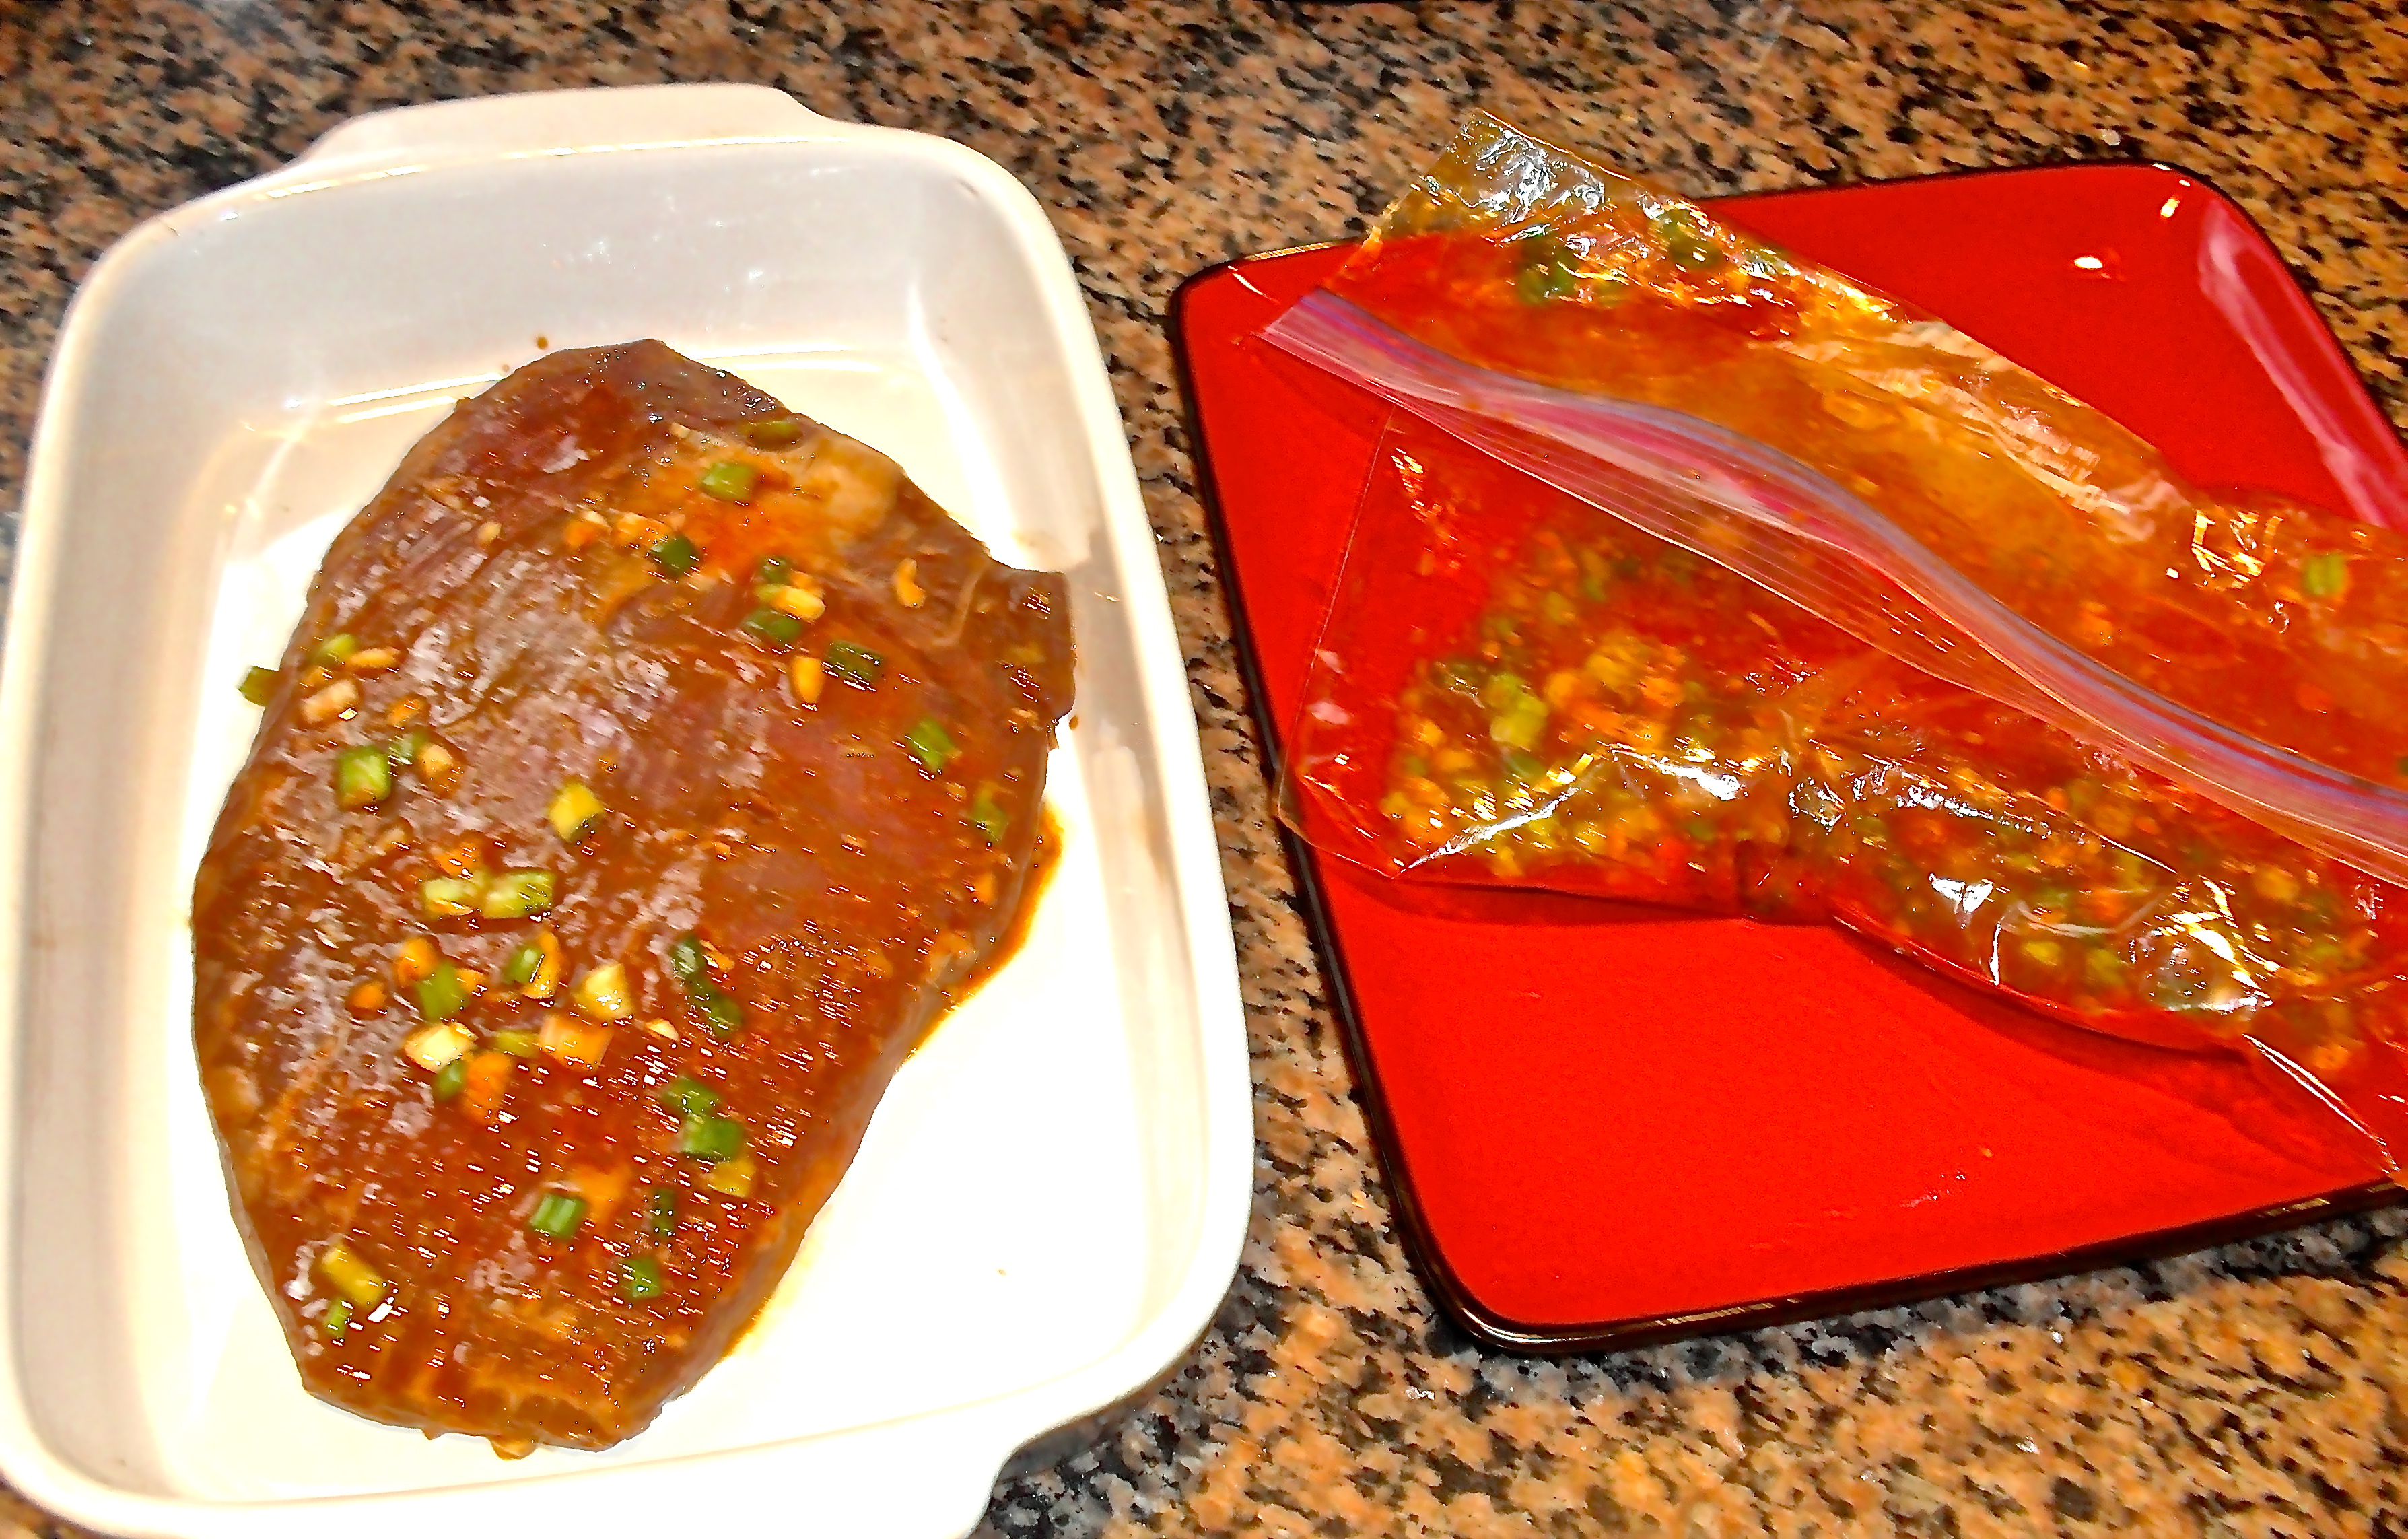
In a ziplock bag, pour in a generous cup of  your marinade.  Add the flank, squeeze out the air, and seal the bag.

You don’t need much.  You don’t want to drown the poor thing!

Massage the marinade into the meat and marinate for 2 hours, flipping and massaging again after one hour.

(Go do something else while it marinates.  You are not cooking yet. This is a great recipe for multi-tasking.)

HINT:  Since my flank steak was well-chilled when I put it in the bag, I did not refrigerate the bag for the two hours.  If you do, then your meat will not be approaching room temperature when you cook it.  That’s a problem, because the inside of the meat will be very difficult to heat during the cooking process.  The steak will be fine on your counter because it’s in a sealed bag in a slightly acidic concoction, so no need to put into fridge.  If you want to marinate it longer and do so in the fridge, just plan accordingly so that you can let the meat sit out a bit before cooking. It won’t take long at all because the cut is thin.

Next, remove the steak from the bag, and  reserve the marinade in the plastic bag.

Place meat on microwave safe dish and blast it for 2 minutes, uncovered.

Calm down… It won’t hurt the meat.

Avoid plastic wrap, please. If you cover the dish, the meat will steam and give up too much of its juice.

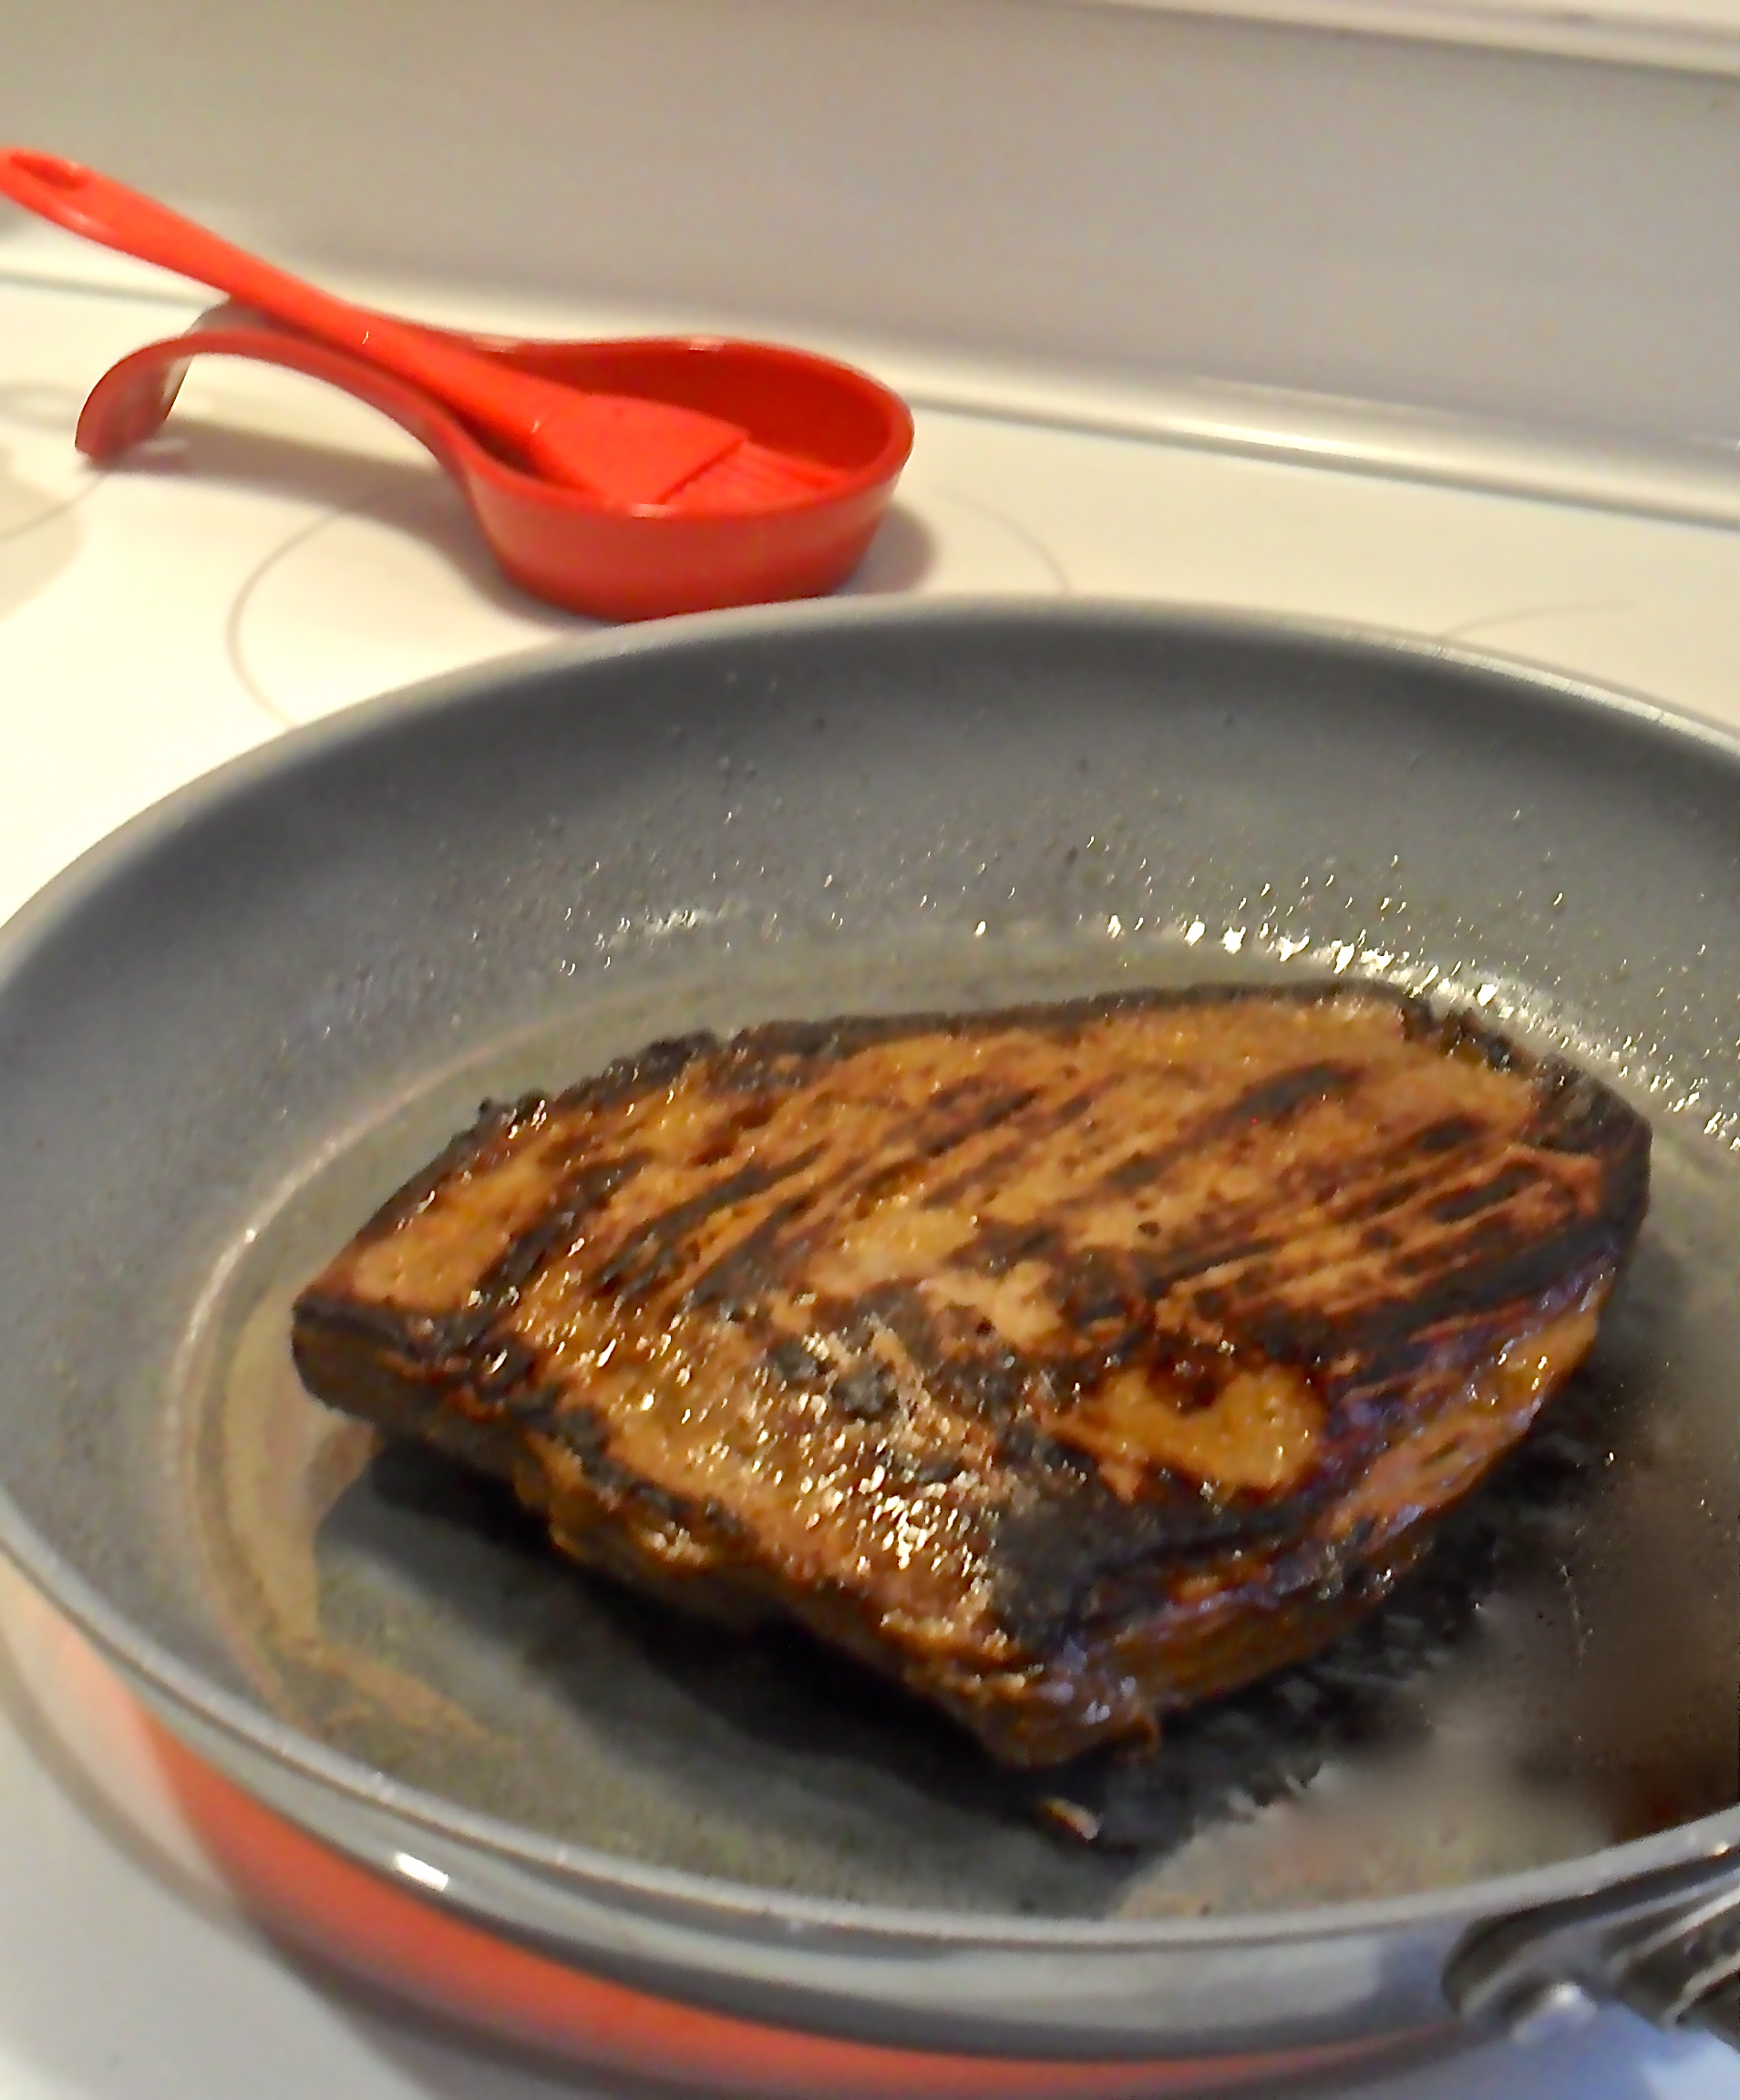
Then, coat a heavy bottomed pan with 2 TBSP of oil  (you chose which you prefer for searing in high heat. I like either olive oil or vegetable).

Crank up the heat, and when the oil starts to jump,add the meat.  There should be an audible hiss as the meat hits the hot pan.

Sear on each side for 2 minutes.

The meat will begin to shrink a bit, but good things are happening inside.

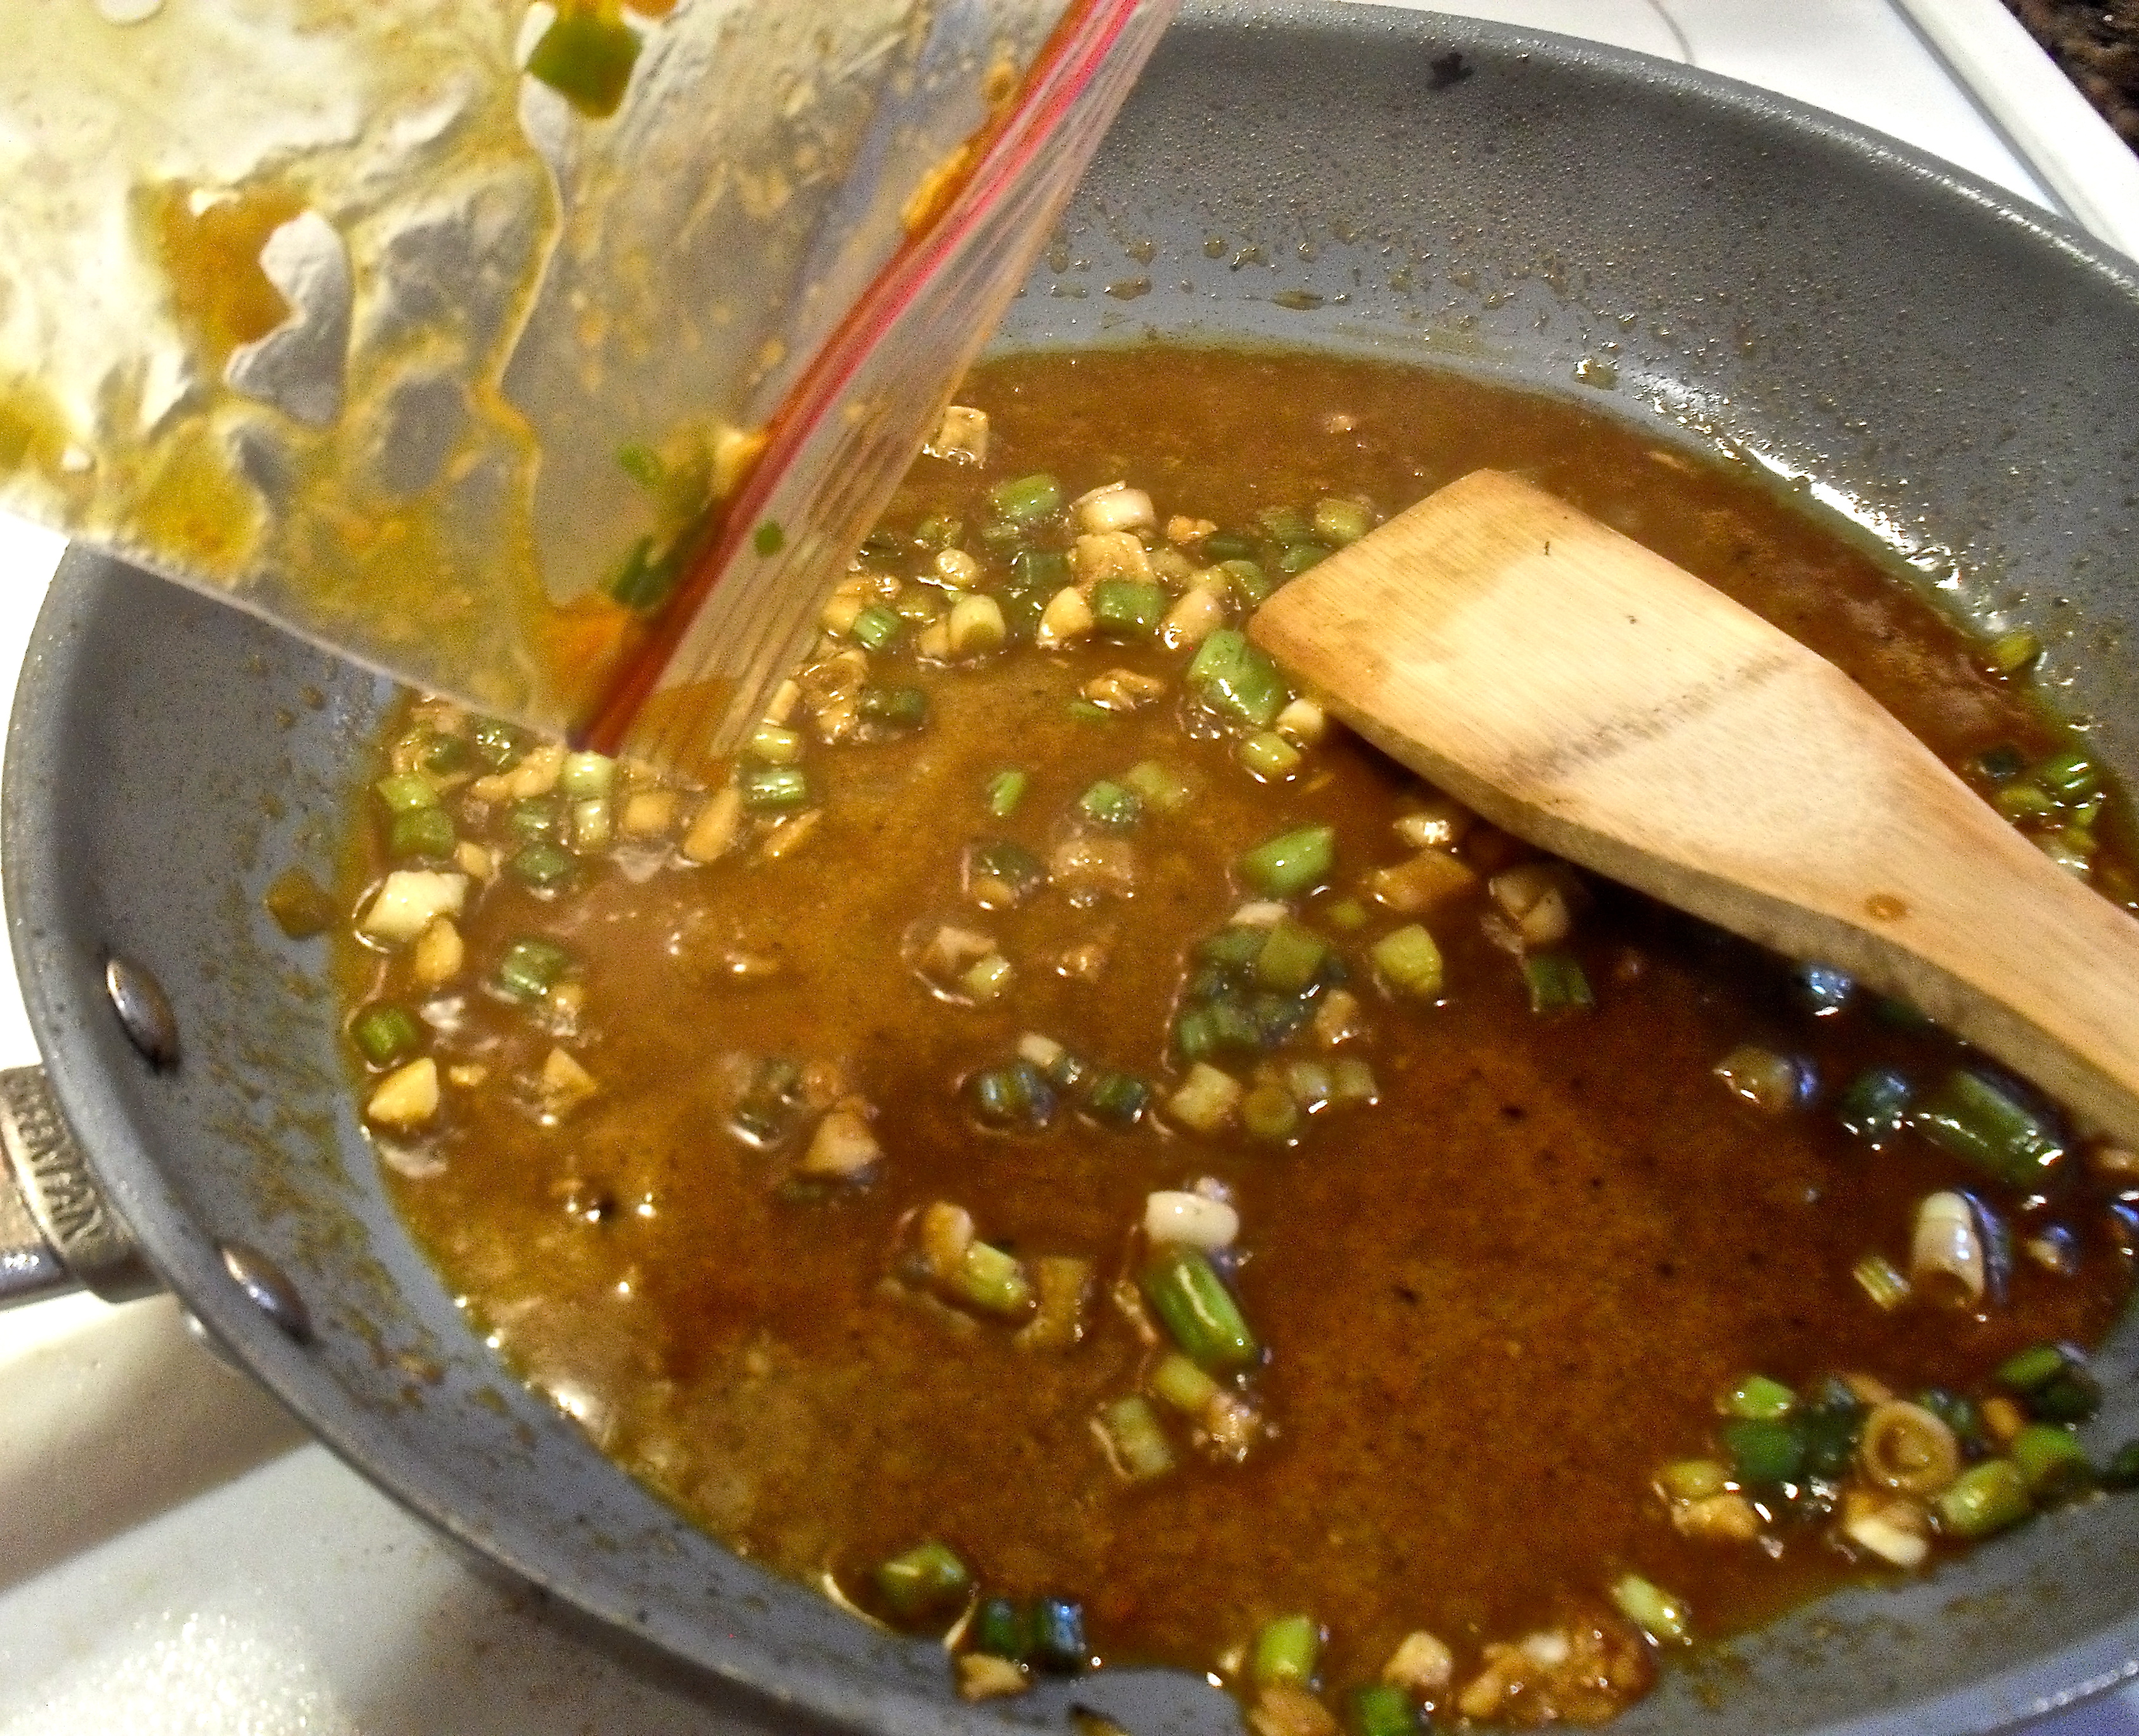
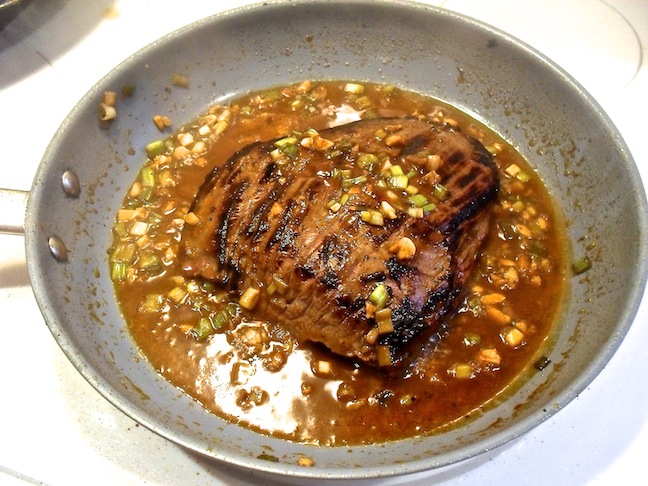
Remove the meat from pan and put it aside while you pour the remaining marinade from the bag, plus 2 TBSP of water, into the pan.

Lower the heat and let the sauce reduce for 2 minutes. If you wish, add more water.  It will tighten up quickly.

Return the meat to the pan and cook covered for…yup… 2 minutes (1 minute on each side).

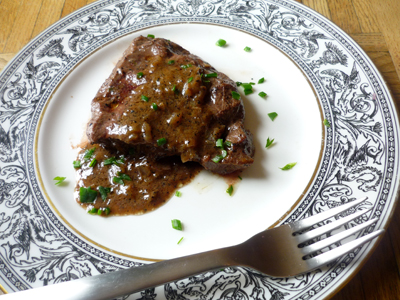
Remove from heat, and let the steak rest for a good quarter of an hour or so.  Then slice the meat on an angle, cutting across the grain.

Juicy, tender, and very flavorful. Best served medium rare.  And wonderful in sandwiches, too.

 Got any ideas for sides?  Tell us what you think would help round out this main dish.

====================

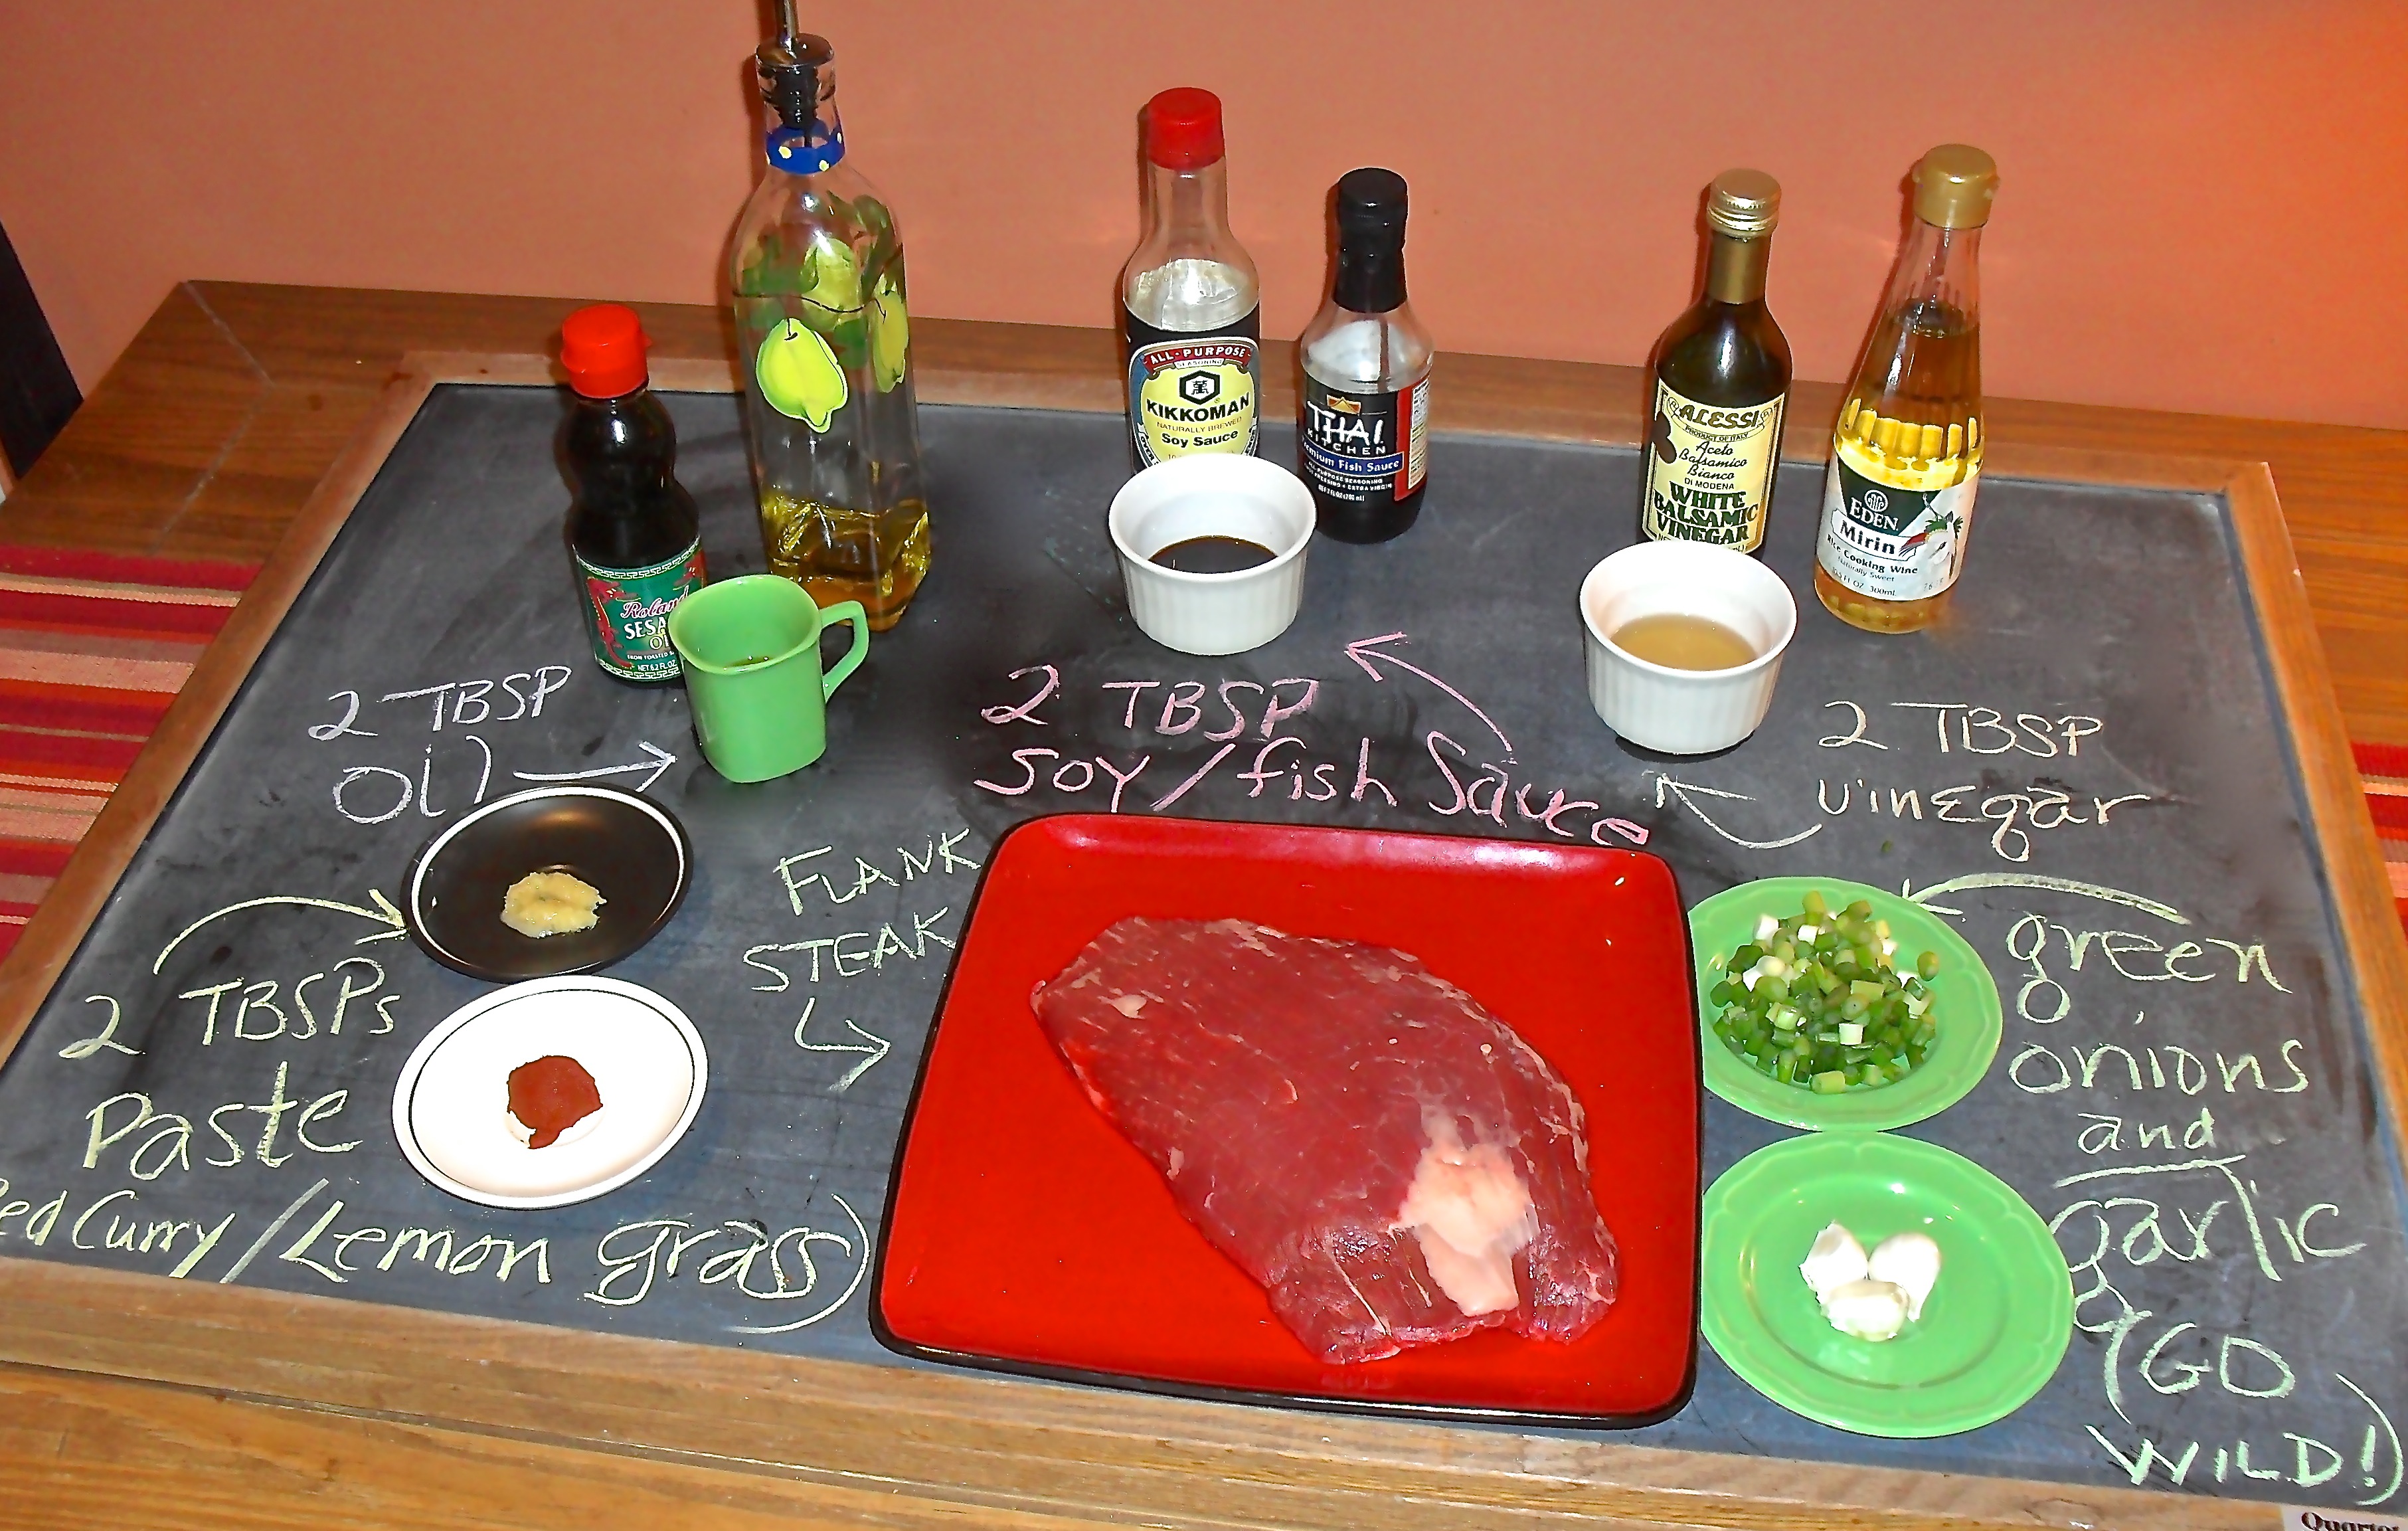
Recipe for Asian marinade:  2 Tbsp of oil (sesame or olive of combo of both), 2 Tbsp of vinegar (white balsamic or white rice or combo of both), 2 Tbsp of paste made from Thai red curry and lemongrass paste, 2 Tbsp of chopped green onions, 2 cloves of garlic or more, and if you wish, 2 tsp of brown sugar, 2 Tbsp of soy (but salt to taste is better, because soy is sometimes a little funky in a marinade, but that’s my POV).  Stir well.