Fast Food Can be Slow Food: Cooking Under Pressure

Leave a comment

Cooking Under Pressure
by Martha Esersky Lorden

The Slow Food movement has issued a challenge to the way we eat. Its premise that sustainable, locally raised plants and livestock can transform this nation’s over-dependance on a globalized, national food industry that markets unhealthy fast food products has everyone rethinking what they eat and how they cook.

In addition, the movement celebrates regional and traditional food products along with the personal history accompanying their preparation. Savoring our food, preserving old food ways and cooking methods and reflecting on how we source ingredients is at the very heart of the movement. So when I tell you that you can still march in the ranks of the Slow Food movement while accelerating cooking time, you might be a bit surprised. In this era of speed reading, speed walking, and even speed dating, you really can speed up the cooking process, yet stay true to the school of Slow Food, with an old-fashioned, ingenious piece of kitchen tech known as the pressure cooker.

In today’s home kitchen, cuisine rapido is an obsession and much needed skill in our overbooked lives. The preponderance of cookbooks promising Quick and Easy, Quick and Healthy, or 1-2-3  meals tells us that we desire tricks for getting simple-to-prepare, healthy meals on the table. The set-it-and-forget-it ease of the slow cooker is certainly an option, but you will find that a pressure cooker delivers a complete, nutritional one-pot meal in minutes that is as good as the long, stewing variety.

fagor-duo-6-quart-pressure-cooker-img-300x219

History of the Device

In 1679, during the reign of the English King Charles, a French physicist and mathematician named Denis Papin invented a cast metal furnace with a locking lid that raised the boiling point of water from 215º to 250º. The high temperature cooked and softened meat quickly, but this “digester” posed dangers of explosion, given the difficulty of regulating the steam pressure. Eventually, Papin invented a safety valve, but there was still the problem of cracks in the cast vessel. Despite earning him membership in the Royal Society after a successful demonstration of the device to King Charles and Society aristocracy, Papin never saw the complete success of his concept, though the science and application of his invention were established.

The set-it-and-forget-it ease of the slow cooker is certainly an option, but you will find that a pressure cooker delivers a complete, nutritional one-pot meal in minutes that is as good as the long, stewing variety.

The pressure cooker eventually became more than a science experiment. Commercial cast iron models appeared in the 19th century, and small domestic models came later. By the early 1920’s, home cooks employed them, but some dangers still persisted. With the arrival of World War II, as most manufacturers converted production to wartime industries, commercial pressure canners prepared food for hungry soldiers across the seas. With the war’s end, home cooks could enjoy modern appliances at cheap prices as manufacturers capitalized on the “benefits of using a pressure cooker for preparing meals, cooking in just one-third of the time, preserving vitamin and mineral content of food, and saving both food flavor and color.” (Miss Vickie’s Pressure Cooker Recipes)  

fis_frau-mit-altem-skt_-inhalt-kartofflen

But by the 1950’s, the pressure cooker was overshadowed by products such as frozen foods, boxed preparations, and other convenience foods which touted a “modern” and “healthy” approach to food preparation. When the interest for a natural and healthy approach to eating surfaced in the 1960’s and 1970’s, the pressure cooker re-appeared briefly, only to be overshadowed by the arrival of increasing fast food options, the slow cooker crock pot, and the microwave oven. Once again, the pressure cooker retreated to the bowels of the kitchen cupboard. Considered old fashioned and not a major go-to appliance, some women were simply reluctant to use a mechanical device which sent out a plume of steam from a jiggling valve and sputtering top.

il_fullxfull.286409363

Pressure Cooker Advantages

While most Americans kept grandmother’s pressure cooker stored in the cellar, European and Asian manufacturers perfected the device, still found in most homes abroad.

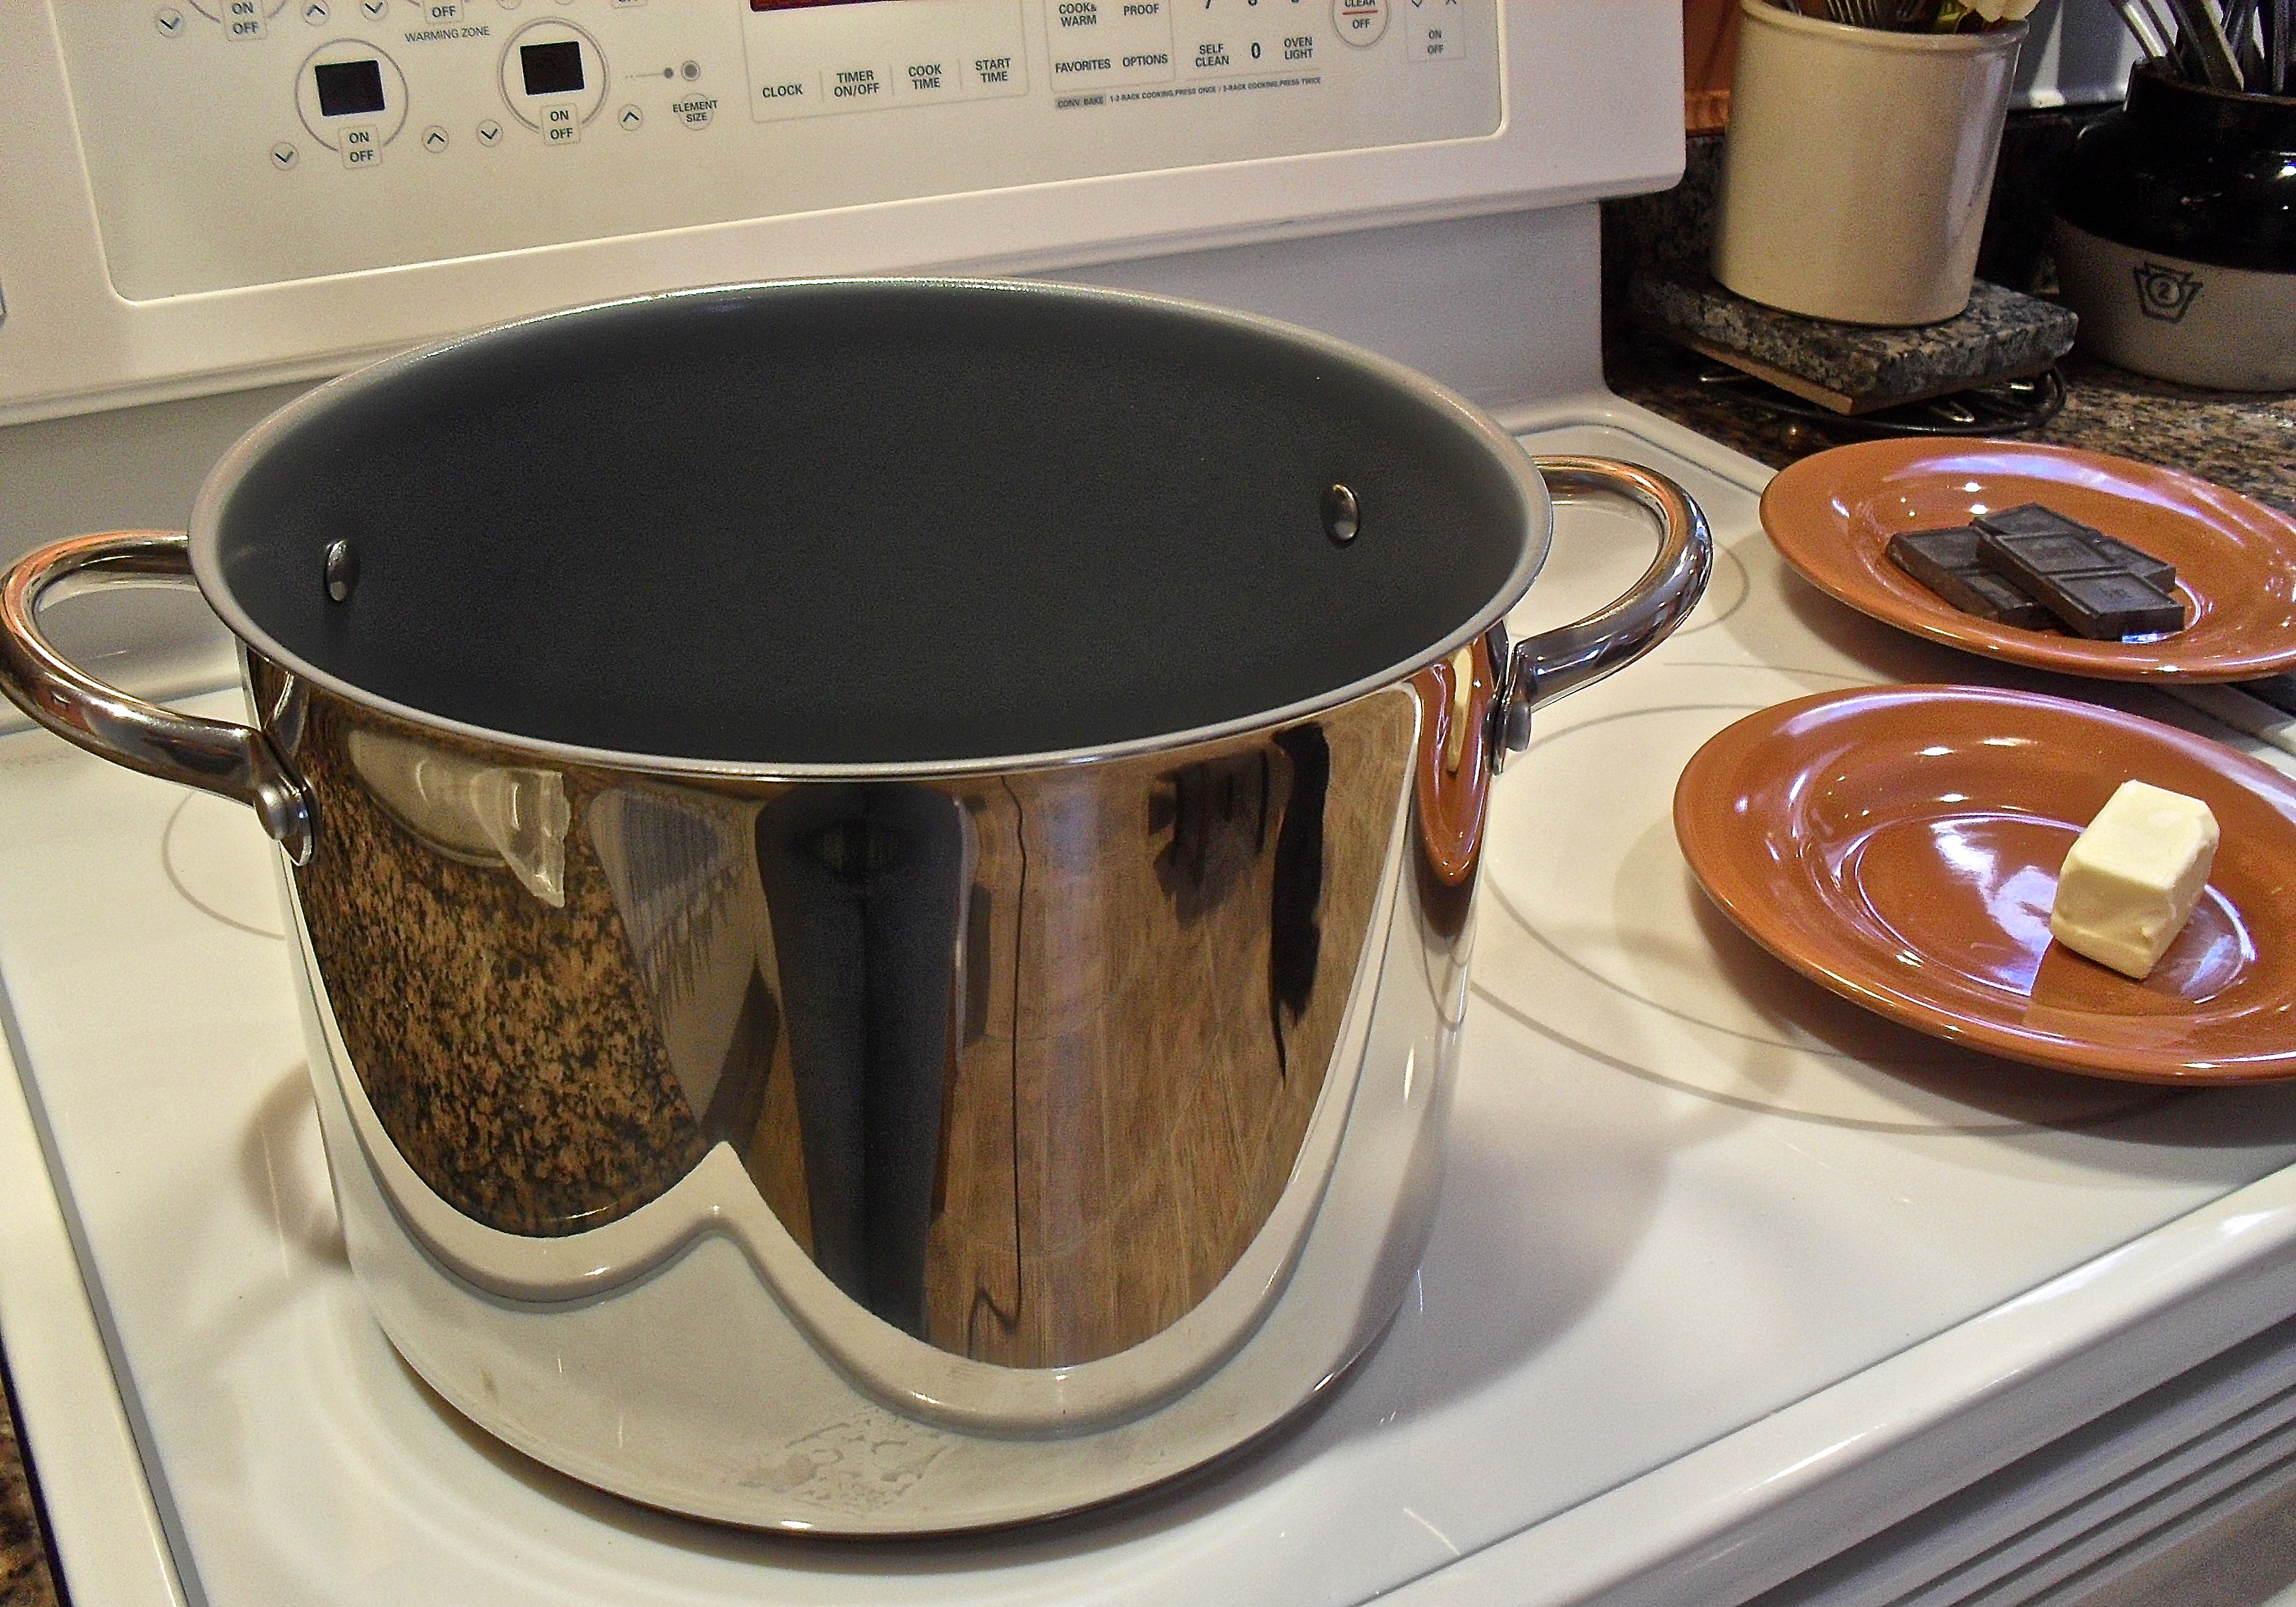
Why is this old-fashioned cooking method suddenly popular again today? New models have improved with the advent of better safety-valve design, nonstick surfaces, low noise, ease of use, and even electric models. Today, these new generation, high-end pressure cookers are being exported to America. The pressure cooker of old that rattled, belched, and steamed on the stovetop is a thing of the past.

The advantages of this cooking method are many:

1) You will eat healthier food in less time. Food cooks in up to 70% less time.

2) You can save money.  A quick cooking time means saved energy by using two-thirds less energy. Eat faster and pay less.

3) Less heat escapes into your kitchen.

4) Cheap cuts of meat can be turned into tender, better tasting dishes by the enhanced flavor.

5) Economical whole foods like dried beans, grains, root vegetables, and rice are quick dishes.

6) Flavors are preserved as the food cooks in its own juices, not diluting liquids, producing a rich gravy.

7) Modern pressure cookers are a multi-purpose pot and not just for steaming. They can be a Dutch oven, sauce pan, or a baking pan.

8) Pressure cookers are a quick way to can or preserve foods.

Cooks can count on making better tasting, nutritious food in the fraction of the time with a pressure cooker.

My mother’s pressure cooker was a slightly bent, aluminum affair with a dimpled surface. I remember the clickety clack of the dancing safety valve as the steam escaped. She still talks about the pot roasts and potatoes she cooked in it. When she offered me the cooker and food-stained manual with recipes, I declined, foolishly. It just seemed too passé, too complicated. But since then, I’ve enjoyed two memorable meals made in a pressure cooker. I once prepared a succulent pork posole with a Pueblo Indian woman at her reservation home in New Mexico. In fact, I was so enamored of this meal steeped in tradition, and so grateful for her day of cooking instruction, that I gifted her a new pressure cooker to replace her flimsy, worn-out model. Frankly, I’d be surprised if she gave up her ailing, tried and true model for the new one. I enjoyed another memorable dish of a tender, rosemary pork roast braised in milk. It was prepared by a Roman woman who hosted me during my first visit to the city. I still can’t get that dish and its sweet, rich and creamy sauce out of my mind, and I’ve included the recipe below.

The popularity of the pressure cooker is, well, exploding. As a cooking technique, it is wonderfully in sync with the emerging, modern food philosophy. With so many excellent models (see What to Look for in a Pressure Cooker, America’s Test Kitchen, www.youtube.com/watch?v=IiCUKA7dDUs) to choose from, the convenience of a fast, whole food meal is accessible and easy to schedule into our busy lives. A pressure cooker could just be a modern kitchen’s best kept secret.

RECIPE

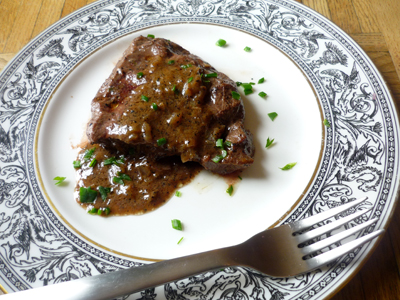
Pressure Cooker Pork Loin Braised in Milk à la Romana

This recipe is adapted from The Classic Italian Cookbook by the late, great Marcella Hazan. The dish is excellent served on a base of warm polenta with a sauté of Porcini mushrooms. 

It’s hard to believe this company’s coming dish only takes about 40 minutes to cook, thanks to the magic of the pressure cooker.  

INGREDIENTS

2 tablespoons butter

2 tablespoons olive oil

2 pounds pork loin in one piece with some fat on it, securely tied

2 teaspoon salt

freshly ground black pepper

about 2 ½ cups or ¾ lt. milk

INSTRUCTIONS

1.In the pressure cooker, with the lid off on medium-low heat, melt butter and oil.

2.When the butter is melted add the meat, fat side facing down first.

3.Brown the roast thoroughly on all sides, and finish on the side where you started.

4.Add the salt, pepper, bay leaf and milk pouring it on top of the roast and adding enough for it to cover the roast by half.

5.Close and lock the lid of the pressure cooker. Turn the heat to high and when the pressure cooker reaches pressure lower the heat and begin counting 30 minutes cooking time at high pressure.

6.When time is up, open the pressure cooker with the Natural release method – move the cooker off the burner and wait for the pressure to come down on its own (about 10 minutes). For electric pressure cookers, when cooking time is up count 10 minutes of natural open time. Then, release the rest of the pressure using the valve.

7.Move the roast to a serving dish tented with tin foil to rest.

8.Let the sauce cool and spoon out the fat, discard the bay leaf and reduce the sauce in the open pressure cooker, if needed.

9.If you do not like the coagulated milk clusters, whisk in some fresh milk or cream or break them up with a stick blender. Taste to check seasoning and add any additional salt, if needed.

10.Slice the roast and arrange on platter. Pour on the warm sauce and serve.

The Last Dish

6 Comments

by MELorden

I have a regular volunteer kitchen clean-up crew of one in my house– my husband.  Like many households in the modern era, kitchen duties are shared by couples and family members. Interestingly enough, I have no memory of ever brokering this arrangement, and that is why the fact that my husband leaps for the sink after mealtime to wash up touches the very depths of my heart. How generous, how thoughtful, how sweet. What better wish is there for the exhausted chief cook and bottle-washer than to pass along her dish duty to a willing and appreciative mate?

After several decades of this arrangement, I say, “Be careful what you wish for.”

My husband’s dish-doing has become a great source of frustration for me. The task has become, of late, a gesture with little skill behind it, and the more I request he attend to a few details of proper washing up, the less likely he is to oblige.

First of all, we have a dishwasher.  Yes– that’s right.  So how can simply loading it be problematic?  It’s not that I care about the arrangement of the dishes, but since the machine is on its last legs, and we don’t run it everyday, there are just a few simple considerations that would make a world of difference– like, please rinse the grease and goo off the dishes.  If not, the drying food festers and smells up the dishwasher, and oh, yeah– doesn’t come off in the cycle.  And wine glasses should not go in because they shatter from the extreme heat and break when the swirling water crashes them up against the other glasses in the top level.  And the peanut butter on knives and oatmeal on spoons need to be rinsed off because the dishwasher simply can’t clean them, especially after they have cured to cement.

Since hubby generously empties the dishwasher, too (What a love!), he obviously doesn’t mind putting dirty flatware  back into the drawer, or picking out the shards of broken glass. I spend pre-meal time re-washing and scraping the crud off the forks and dishware, particularly when we have guests.

His technique for washing pots and pans also leaves much to be desired.  It’s a quick perfunctory tour of the inside of the pot with the greasy and soap-less sponge.  Drying with a dish towel simply spreads the grease around. I used to redo them quietly, but now I toss them back into the sink, soap up the sponge with very hot water, and glare. Yup. You get a do-over, Buddy.

Most irksome of all is when my Dinnertime Dishman (I think there is a blues song in there somewhere) flicks off the kitchen light and retires to the living room with his coffee and reading material, well-fed and self-satisfied with his specialized and self-appointed marital role on the kitchen front. I enter the kitchen right behind and approach the sink with dread.  And as always, in the bottom of the double basin is the sodden sponge, chunks of food, along with both drain catchers full to the brim with bone and gristle and pieces of garbage. Shining brightly around the entire edge of each sink is a reddish-brown, tomato-tinged ring of soapy slime– evidence of my husband’s valiant effort.

h2947

I cry out, deliver a stream of mildly cynical rantings, and commence a vigorous scrubbing and disposing of the nasty bits of food.  I sing out, “Remember, please, that the sink needs to be washed, too.  Think of it as the last dish, honey, okay?”    I hope the term ‘honey’  helps.  A muffled ‘yup’ is the only reply.

il_340x270.215472771 I am married to a very helpful man, and since hammering nails and any sort of house repair is really not his thing, I get a great guy who runs a vacuum, makes the bed, hangs up his clothes, and washes dishes– all without any begging on my part. He gets lots of points for that along with my adoration and love. But it’s his role as dishwasher that really seems to impress my family and friends. To that I say phtppp.

Sure, getting some fancy new dishwasher might forever end my anxiety about the whole affair, but there will always be the matter of the last dish, my husband’s last stand– a gentle and annoying reminder that when it comes to doing the dishes, he is going to continue to do them on his terms.  I think we’ll be going out to dinner more often.

The Possibilities of Pizza

Leave a comment

by Martha Esersky Lorden

Doesn’t every city in America have a Tony’s Pizza Parlor? Mine did. I have no idea if the proprietor was actually named Tony, but the restaurant was a fixture in my home town for decades. The pies were big and chewy rubber platters sporting a layer of glistening grease atop industrial mozzarella cheese. Heavy tomato sauce and dried oregano were also applied liberally. And I loved every bite. Frankly, everything at Tony’s tasted the same— the gummy spaghetti and meatballs, the soggy fried eggplant parmesan, and each variety of pizza. A favorite family restaurant, Tony’s was the only game in town when it came to pizza.

My pizza IQ rose significantly when I moved to Italy. The neighborhood pizzeria had a large glass window through which a tiled wood-fired oven glowed. The pizzaiolo put on a show while preparing the dough every morning. I watched him through the restaurant window regularly, and it was love at first sight. Our eyes met over clouds of flour as I watched him knead the soft spheres of fresh dough for their numerous rises. It’s difficult to say whether I was moony-eyed over the adorable Enzo or if it was the yeasty perfume that had simply gone to my head. His pizza was delicious, as was most all pizza I ate in Italy. I was particularly touched when one evening he brought a heart-shaped pizza to my table. I have a photo of it somewhere.

385829_547248831975903_902792817_n

Pizza Margherita:  Classic Simplicity

The Appeal of Pizza

Romance aside, pizza is an iconic Italian dish, but today pizza pie is as American as apple pie. The statistical evidence is overwhelming: on average, individuals in the US eat about 46 slices per year—that’s 23 pounds of the stuff. Americans are piggy for pizza. With nearly 65,000 pizzerias in the nation, Americans are gulping down 350 pieces of ‘za every second. The national pizza market, according to Ezine, is a $30 billion industry. Americans are simply obsessed with pizza, which is no surprise. It fits in nicely with that popular American idea of food as fun and fast, as road food or weekend take-out party grub that goes down perfectly with beer or coke. It’s the ideal accompaniment to sports television and makes for easy clean-up in the dorm or man cave.

Culinarily speaking, however, pizza’s place in the American diet has been elevated from this stereotype. While the first pizza parlor opened in America in New York City in 1905, pizza today is no longer just a specialty food made by dough-tossing dudes in classic pizza joints. Fashioned by professionally trained chefs, stylish bistros, and home cooks, pizza is currently a highly adaptable food style, a culinary foundation for very good eats. On careful examination, pizza can be the perfect vehicle for nutrition, creativity, and artisanal quality dining.

Vince Guiffire Makes a Pizza

Pizzaiolo at work in NYC Pizza Parlor Circa 1950

Culinary History

pizza_historyIn its most basic form, pizza is a flatbread made of flour and water with Mediterranean origins. Bronze Age people ate pizza in the Veneto region of Italy. While on military campaigns in Phoenicia and Greece, Roman soldiers consumed a simple seasoned flatbread. 3215391860_0de82f93ac_oDuring the Middle Ages, peasants topped yeasted dough with herbs and olive oil, and Renaissance pizza eaters experimented with the newly arrived tomatoes from the Mondo Nuovo and cheese made from the milk of the imported Indian water buffalo. By the 18th century, peasants in Naples incorporated the tomato on their flatbread base, selling pizza as street food and eventually in shops along the streets. In time, the dish made its way to the Italian aristocracy when, 120 years ago, a pizza vendor by the name of Rafaele Esposito of Naples created the popular pizza Margherita for Italy’s Queen with its tri-colori of the nation’s flag in green basil, white cheese, and red tomatoes. Soon the various regions of Italy created their own signature versions of pizza celebrating local ingredients.


Queen-Margherita

With the return of American GI’s after World War II, their penchant for pizza led to parlors in most every Italian-American neighborhood. Styles of pizza reflected a multitude of American regional preferences. So, who is to say what “real” pizza is? With so many genres, it is difficult to know. East coast cities like Boston boast a pizza that rivals the thin-crusted New York style. Many prefer Greek-style pizza with its thick, puffy, and chewy crust served in rectangles or as pies topped with feta, olives, green pepper, and onions. Sicilian style pizza, or sfincione, a doughy square-cut bread pizza topped with cheese and tomato, is baked on a sheet and requires two rises, not the one typical of most American pizzas. Then there is Chicago’s Deep Dish casserole pizza layered between a top and bottom crust and stuffed with pounds of sliced ham, sausage, several cheeses, vegetables, pepperoni, and a rich tomato sauce. Today, nearly every restaurant has a pizza or flatbread selection on the menu. Modern Italian restaurants in America have exquisite pizza ovens that reach 800 degrees Fahrenheit and are fired by carefully selected hardwoods that deliver the charcoal-flavored, thin and crunchy crust desired by today’s gourmet pizza diners. Rustic at heart, pizza is now a culinary tour de force.

Pizza has a global fan base that is growing, too. Many nations have adopted their cuisine to include pizza. International variations feature a Mochi-crusted Japanese pizza, a Turkish pizza on a round shell with meat sauce called lahm bi’ajin, and a Korean adaptation with kimchi and bolgogi toppings. In Europe there is the French Provencal pissaladiere with cooked onions, anchovies, and olive oil, along with a popular German flammkueche, a thick circular dough topped with crème fraiche, onions, and bacon.

Build Your Own Pizza at Home

The potential combinations of bread-based crusts and toppings is stupefying. And home cooks can now leap right into the fun. No need to rely on pre-made frozen pizza, delivery, or take-out. The resources to make a quality pizza in tune with individual dietary preferences and tastes is infinite. There are really just three parts to pizza creation— crust, toppings, and heat source.

Crust

If you don’t care to make a pizza dough from scratch (see recipe below), there are fabulous options in the grocery store. Consider the potential of the following items as the base of a quality home-cooked pizza:

  • Fresh made pizza doughs (whole wheat and white flour) are found in the prepared foods section
  • Numerous flavors and sizes of pre-baked, fresh-frozen, and gluten-free pizza shells from artisanal bakeries in Vermont and New Hampshire such as Stonefire, Little Red Hen, Green Mt. Flour, and Mama Mary’s
  • Naan flatbreads
  • Tortillas and wraps of every variety
  • French bread and baguettes
  • Frozen puff pastry
  • Pita bread
  • Broad, crunchy crackers like lavash or Torte de Aciete by Ines Rosales from Spain

Naan-Pizza

Pre-packaged Naan Indian bread  makes a fine option for a quick home-crafted pizza

Toppings

In selecting toppings, consider the meal. Are you making an entrée or an appetizer? Or perhaps you want to stretch a meal of salad or soup with a crusty slice. And how about breakfast? Not the usual cold leftover slice, but a fresh pizza adorned with scrambled eggs, sausage, ham, bacon, and some crispy potatoes. The leftovers from last night’s BBQ chicken work well, too. Go vegan and make seasonal vegetables like asparagus, leeks, and snap peas the stars. Take your inspiration from international cuisines and think Mexican with taco-themed toppings or Indian Tandoori curried chicken and paneer pizza. For a dessert pizza, top a pate brisé crust with sweet pastry cream, seasonal berries, kiwis, and powdered sugar. If you love cheese, combine feta and lamb, a local goat cheese with baby spinach and arugula, or fontina with mushrooms. Smear shells with pesto, truffle or chile oil, anchovy paste, or a spicy salsa.

Heat Source

Bake fresh pizza at home at the highest temperature your oven can go. Commercial ovens bake at well over 500 degrees, and wood-fired ones crank at nearly 800 degrees Fahrenheit. Place the pizza in the top of the oven on a pre-heated pizza stone, and it will cook in 10-12 minutes.

An excellent way to enjoy pizza is to use the outdoor grill for the best direct heat delivery. Bake dough directly on the rack for 5-10 minutes, then flip. Fill the shell with toppings. Close the lid and grill another 5 minutes until the cheese is melted and bubbling. Pizza also cooks well in a cast iron skillet on the stovetop or inside the oven, and if using pre-baked crusts, just stick the pizza under the broiler for 2 minutes.

Pizza is a perfect food with universal appeal. It is an attractive and creative option for home cooks who want to prepare a convenient meal. Sink your teeth into a great crust loaded with flavor, texture, and nutrition. Bring the elegance of pizza into your own kitchen—without the box.

Schermata-2011-03-10-a-10.01.47-copia3-600x380

Classic Pizza Dough Recipe

(from the Cooks’ Illustrated Cookbook, America’s Test Kitchen, 2011 )

This is an easy, shortcut pizza dough that produces a crispy crust when made on a pizza stone and can “practically be made in the time it takes to heat the oven.” Bread flour works extremely well, but you can substitute all-purpose flour if you wish. The bread flour, however, promises a somewhat chewier texture.

This recipe makes 2 pounds of dough, enough for two 14-inch pizzas.

4 to 4 1/4 cups bread flour
2 1/4 teaspoons instant or rapid-rise yeast
1 1/2 teaspoons salt
2 tablespoons olive oil
1 1/2 cups water, heated to 110 degrees

Pulse 4 cups flour, yeast, and salt together in food processor (fitted with dough blade if possible) until combined, about 5 pulses. With food processor running, slowly add oil, then water; process until rough ball forms, 30 to 40 seconds. Let dough rest for 2 minutes, then process for 30 seconds longer. (If, after 30 seconds dough is sticky and clings to blade, add remaining ¼ cup flour 1 tablespoon at a time, as needed.)

Transfer dough to lightly floured counter and knead by hand into smooth, round ball. Place dough in a large, lightly greased bowl; cover bowl tightly with greased plastic wrap and let rise at room temperature until doubled in size, 1 to 1 1/2 hours, before using.

Fontina, Caramelized-Onion, and Pancetta Pizza

(from Cooking Light, October 1998 )

For a mellow and melt-in-your-mouth cheese pizza with a sweet and salty bite, try this simply prepared topping. It’s bursting with flavor.

1 1/2 ounces pancetta (Italian-style bacon) or Canadian bacon, chopped
8 cups sliced onion (about 3 large)
1 tablespoon chopped fresh thyme
1/2 teaspoon salt
1/2 teaspoon white pepper
1 tablespoon olive oil, divided
3/4 cup (3 ounces) shredded fontina cheese, divided
Thyme sprigs (optional)
Cracked black pepper (optional)

Preheat oven to 475°F.

Heat 1 teaspoon olive oil in a large nonstick skillet over medium-high heat; add pancetta, and sauté for 2 minutes. Add onions, thyme, salt, and white pepper; cook 25 minutes or until onions are browned, stirring frequently.

Brush each prepared pizza crust with 1½ teaspoons oil; top each with half of onion mixture. Sprinkle half of cheese over each pizza. Bake at 475° for 9 minutes or until crusts are crisp. Cut each pizza into 8 wedges. Garnish with thyme sprigs and sprinkle with black pepper, if desired.

Atomic Cake: An Explosive Confection

7 Comments

From the 1950’s, here’s a birthday cake that mom can make even while the family is cowering in the fallout shelter. Bless her heart.

301968_10150899306145051_668891930_nPhoto by ME Lorden

Evaporated milk, crisco oil, powdered eggs, and 3 boxed cake mixes are used to make this  chocolate and vanilla pudding-filled cake with canned fruit layers. Slather the pudding between the  triple golden, vanilla, and chocolate cake layers with maraschino cherries and canned pineapple. Wrap the entire chemical wonder with Dream Whip and then—KABOOM! Atomic cake.

Heat source to bake the cake? Gas stove or electric if generator is running. Candle power won’t do.

Nothing like eating a sculpture of a hydrogen bomb.  It was all the rage.

e70063f96dc9e413ab94d30dd62a4b20 Who knew that this horrific technology which gave the United States an atomic monopoly would also inspire new culinary tastes?

Better living through chemistry, I suppose.


HBomb

Light-as-a-(radiation)cloud Confection.

Atomic Cake-lo

New fad of celebratory cake among the military elite.

Enjoying atomic pastry along with their atomic cocktails.

The Soviets were offended by this publicity photo and the idea of an Atomic Cake altogether.  US clergymen found it obscene. The newspaper headlines of the day reported on the indignation.  The atomic bomb was clearly best kept off the list of fun food themes with the great cake controversy that began in 1946.

Check out the following link:

Atomic Cake Media Controversy

Soviet Cake


cake_atomic2_med22

These creamy sweet layers are pretty luscious.

 You can substitute sliced bananas in one of the layers for the pineapple if you aren’t stuck in the bomb shelter.

This clever cake explodes with flavor.  Might as well eat up before you kiss your fanny good-bye.

To Market, To Market: List or Luck?

4 Comments

Living 500 yards from a fabulous whole foods style grocery story kind of puts a crimp in our grocery shopping habits.  We visit the store almost daily, usually having no planned purchases in mind. We sniff around and often grab foodstuffs on impulse.  Of course, we consciously go to get the staples (for my husband that would be beer, bagels, and bananas), and when we need milk.  But thoughtful lists of grocery items are rare in our household, and what we ultimately come home with is more often than not a crapshoot.  I’m not so sure this habit is in the best interest of home economics– or is it?

In the early years of our marriage when we lived more rurally, we made lengthy shopping lists and traveled to the big grocery together. We divided and conquered and discussed label choices. Each excursion was a satisfying venture in finding the right products, and then once home, we created the pre-planned menu over the following two weeks. We weren’t counting our pennies really, but we had the good sense to think ahead about what to keep in our cupboards and fridge for the sake of efficiency and avoiding wasted time and food.

grocery-store-checkout-retro

The cute magnetic “Shopping List” pad I got in my Christmas stocking this year is stuck to the front of the fridge.  It is empty.  Ignored. I tell myself that shopping on the fly is just like living in Europe, where the little specialty food shops offer patrons something fresh each day. I rationalize that I am  like Parisians who live off the Rue Cler , or like the villagers in a small Italian town. How romantic.

Shopping in this manner, I say, keeps bought items to a minimum. Because I am walking to the store, I am loathe to lug home heavy bags.  I enter the food emporium as though I were at a museum.  Navigating the stormy sea of produce, I see other shoppers clinging to their carts, checking lists and crossing them out; they are distracted and on a serious military mission with their maps and marching orders.  They backtrack and desperately ask for help from the stock people, and then they take off on their wild goose chases for that one particular product.  Me?  I’m floating through the stacks of a great library of foodstuffs and browsing.  I’m shopping with the right side of my brain. This is a creative endeavor.

On the other hand, as a personal cook, I make highly organized shopping lists for my clients’ orders.  When I shop for them, I go all out. I get into conversations with the butcher and the cheese people and the cashiers.  I enter another realm, and I take such food shopping seriously, carefully avoiding waste or inferior goods. But when it comes to my own habits, I let the formality slip and go on a shopping adventure– destination unknown.

How do you shop? Are you a list-maker?  Do you go to different stores to hunt down particular products?  Or do you “dowse” when you enter the market?

 Is there an advantage to just grazing one’s way through the grocery, or do you think it is probably fraught with danger?  

When Kitchen Implements Inspire

12 Comments

When it’s time to make a meal, my first inspiration is often not the foodstuffs I have hanging around in fridge and cupboards, but rather the sort of cooking technology I really want to use.

“Time to take my cast iron skillet for a run,” I tell myself.  “It’s been awhile since this baby has laid some rubber on my kitchen stove.”  What I end up cooking is determined by what this skillet has always delivered up well.  It cooks a fluffy frittata, a glistening braised pork chop and caramelized apple dish, and a no-fail lemony chicken piccata.  And I’m off to the races, or the grocery store if necessary.

CastIronSkillet3

Another case of how technology shapes what I cook comes when looking in the gadget drawers.  I’m thinking that funky potato peeler with the blade that creates julienne strips has yet to be mastered, though I had some success with it before.  I’ll take on the challenge of the tool with the goal of making a pasta-less dish of strips of zucchini, carrot, summer squash, and sweet potato topped with the pesto I made last summer.  Can’t wait.  (PASTA JULIENNE   from RECIPES, an OTK Featured Column)

zucchini coleslaw_DSC8309

Sure, I’ve fallen victim to some new-fangled contraptions– like most cooks. But these fancy and specialized devices end up as rejected clunkers because I can’t master the mechanics, or I struggle assembling or cleaning all the pieces. In reality,  I lose interest because they simply fail to inspire good dishes.

Cooks look for cutting edge tools, but not necessarily because they are uber-efficient or impressive gizmos.  A truly great piece of kitchen technology invigorates the cook and gets the creative juices flowing. One look at that gorgeous pot or paring knife can coax any cook to turn on the burner and rattle those pots and pans.

What tools in your kitchen inspire your cooking? 

Tell OTK about your go-to kitchen technology and the memorable dishes you have created with it.  

Steak Diane

Leave a comment
Tina Rosser  shared  this humorous essay  with OTK last week.  I thought you would enjoy it, along with a copy of Pierre Franey’s recipe for Steak Diane.             –MELorden

STEAK DIANE:  An Elusive Recipe

by Tina Rosser

a-koenig-diane

For years I’ve craved a good steak Diane.  What, you may ask, is Steak Diane?  Well, if you know what it is then you are well past your Use By date, but for the rest of you young ‘uns, Steak Diane is a mighty fine piece of meat pounded into oblivion and then sautéed quickly with butter, chives, cognac and a couple of other ingredients.  It was a big deal in restaurants back in the 40’s and 50’s but is now next to impossible to find on any menu.  And if you happen upon a willing chef, the version you’ll get will probably be nothing like what was being served way back when.

I first sampled Steak Diane in a restaurant outside Baltimore somewhere around 1973 or so.  Wealthy boyfriend’s parents were in town which was the only reason I got near that particular restaurant. Since that singular tasting is what I measure all Steak Dianes against, perhaps I too, like those willing chefs, am all wet when it comes to how this dish is supposed to taste.  For years after that one sublime tasting, I searched for a good restaurant Steak Diane.  Sometimes it would appear on a menu and often it seemed that the chef just took a not so fine piece of meat and smothered it in a mixture of A-One Sauce and Worcestershire Sauce.  Not okay.  Once or twice I happened upon a chef who was willing to knock out his version of the dish at which point I would have to swoon and greatly appreciate something that may have been good but was NOT Steak Diane.

Then, during a dalliance with the Book of the Month Club (remember them?), I stumbled upon Pierre Franey’s 60-Minute Gourmet cookbook.  And lo….there it was…a recipe for Steak Diane.  So one evening I decided to try out this recipe and after getting a boatload of flak from the butcher for asking him to pound thin a lovely filet, I managed to gather the rest of the ingredients and whattayaknow!  Presto Change-o! Voila!  Steak Diane as I remembered it!

tumblr_lohbedhw8s1qkkjz3

Fast forward about thirty years (where did the time go???) and here I am ensconced in my little Upper West Side apartment with a kitchen the size of a stick of butter and one cold winter night I get this bee in my bonnet about recreating that Pierre Franey recipe.  When I moved here from Connecticut, I brought along six cookbooks….Julia didn’t make the cut, but Pierre did.  So I hauled out the book and went off looking for the ingredients.  And what did I discover about New York City?  Butchers are rare!!!!!  I went to the Korean market….all the fish you could ever eat….I went to Zabar’s…ditto on the fish along with orange juice to die for…..but not a butcher to be seen.  So,  home I trudged with my shallots and chives and boullion and imported mustard and little tiny bottle of cognac, and after stopping at a Mickey D’s to drown my sorrows in a truly predictable burger and fries (oh hush up….you’re going to tell me you never go slumming at Mickey D’s???) I put all my ingredients away with the intention of finding that steak in the next day or so.

COU0010203But things happen.  Dinner with a friend, a jaunt to Connecticut, a birthday dinner, another dinner with a friend or the kids, and on and on.  So now I have shriveled parsley and chives and a mushy shallot.  The cognac even went into a tea concoction to battle a cold.

Another week goes by.  The temps are hovering in the sub-zero range and I decide I’m required to go out and walk for an hour after which I’m going to run into Fairway and get a nice little roasted bird which I will slice up and throw into a giant dinner salad.  And as I’m walking along in Riverside Park getting frozen to death, that Steak Diane recipe hops into my frontal lobe and knocks out the chicken and salad.  Into Fairway I go and gather up all the ingredients.  My last stop is the butcher who nearly has a coronary when I ask him to pound a beef filet down to about a quarter inch thickness.  I escape the judgement of the Fairway staff, run into a liquor store for a wee bit of cognac and get home where I roll up my sleeves and prepare everything exactly to Pierre’s specifications. Sort of.

It was good.  Pounding that filet sure makes it easy to cook.  Sort of like a fish fillet.  Two minutes a side and it’s perfect.  But it still wasn’t the Steak Diane I remember…..now elevated to epic status and perhaps not remotely achievable.  I did mess with Pierre’s ingredients a bit.  I had half the steak called for in the recipe but used the full amount of oil and butter, parsley and chives.  I went a little shorter on the boullion, cognac, mustard and Worcestershire. With a baked potato (smothered in more butter) and a lovely salad it made for a great dinner.  And I probably would have considered it perfect if not for the memory of that Steak Diane I had so long ago in a restaurant in Baltimore.

So what’s next?  I’m going to keep trying until I get it right.  A little less oil, a little more cognac, more shallots and less chives?  Whatever it takes.  And the perk?  I have a terrific recipe for steak that will thrill all my carnivorous family and friends none of whom are looking for the elusive Steak Diane that I will continue to attempt.  So they win, Pierre gets a workout, and maybe, just maybe, someday soon I’ll get it right.

RECIPE  FOR  STEAK DIANE  (from Pierre Franey, 60 Minute Gourmet)

INGREDIENTS

4 filet mignon, about 6 ounces each; or 4 boneless sirloins

salt and pepper

2 T olive oil

3 T butter

3 T chopped chives OR shallots

2 T cognac

3 T chopped parsley

1 teas. imported mustard

1/2 teas. Worcestershire sauce

2 teas. fresh or canned broth, preferably beef although chicken can be used.

DIRECTIONS

Pound meat to 1/4″ thickness.  Sprinkle both sides with salt and pepper.

Heat 2 T of oil and 2 T of butter in a large skillet and when very hot, add two of the steaks.  1-1/2 minutes on one side, 30 seconds on the other (not long enough for my tastes).  Transfer to a hot serving dish and then do the other two.

Remove skillet from heat and add the chives.  Return skillet to stove and cook about 10 seconds.  Add the cognac and stir.  Add parsley, mustard and Worcestershire.  Add the broth and stir.  Swirl in remaining butter.  Sprinkle the steaks with s and p and pour the sauce over them.

(For more about the history and technique of preparing this dish:   STEAK DIANE: LOST FOODS OF NEW YORK)

Flora’s Fudge

18 Comments

Disney Characters in the Kitchen:  Revisiting A Childhood Recipe

The Fantasy Behind Flora’s Fudge:  Almost As Easy As Magic  (SEE FOLLOW UP NOTE AT BOTTOM OF THIS POST)

I have spent decades yearning for a slice of fudge.  Not just any fudge.  I’ve wanted a hunka hunka burnin’ chocolate nut fudge that I made as a child on a snowy afternoon with my father and sister.  But the recipe was parts unknown, and I only held a faded memory of the comical source of that wondrous fudge recipe.

It was 1959, and I was in a dream world having just seen Disney’s now classic animated film, Sleeping Beauty.  This obsession with medieval castles, a trio of fairy godmothers, and a prince of my own would eventually be eclipsed by a different Disney obsession with Peter Pan, the pirate-loving fella who could fly and preferred to hang out on an island with a team of really cool and furry friends. (I never understood that simpering Wendy.)

At about the same time that I was encountering these Disney role models, I became enamored with cooking with my father.  He loved to cook, and it was obvious in his joy over the stove when he boiled shrimp and stirred cocktail sauce to go with his highballs, much to my mother’s chagrin.  There were his amazing pancakes, eggs, bacon, and all manner of breakfast food.  “I could eat breakfast every meal,” he said.  And sometimes we did.  Having grown up in and around his parents’ bakery and then general store, Daddy was full of food stories about loading and butchering meat, stealing from the pickle barrel, and (my favorite) filling jelly donuts.

Sunday mornings we picked up the newspaper at the local journal joint on Pleasant Street.  The owner was a big cigar smoker and looked like a villain straight from Marvel comics, which he sold racks of.  I liked looking at the comic books (which oddly were displayed near all the dirty magazines). There, that Sunday, in the more PG of the spinning racks, I saw a shiny comic depicting Sleeping Beauty’s own private team of wish-grantors– those  pink, blue, and green Fairy Godmothers.  This comic book was our Sunday morning treat, and soon my sister and I lapped up all the silly adventures of the winged and glittering Flora, Fauna, and Merryweather.  But the added joy was on the back page of the issue where we discovered a recipe, written in a rebus code, called “Flora’s Fudge.”

4color984fairy-godmothers-f

That afternoon, we convinced our father to create what was sure to be a magical confection in our own kitchen. We decoded the recipe together and followed the directions. It was made in a saucepan, and the comic book image of the pot showed a small saucepan shaped like one we owned. For years, every time we made the fudge, about halfway through the recipe, we transferred the melted base into a mixing bowl to add all the confectioner’s sugar and chopped nuts. Within moments of adding the sugar, and nuts, the fudge became impossible to stir.

Of course, I believed, it never would have been a problem for Flora, the fairy godmother.  All she needed was a flick of her magic wand to transform the ingredients into fabulous fudge. Only our father’s brute force could maneuver the spatula enough to combine the ingredients, and I remember looking forward to and giggling at the funny faces he made in the effort. Our father was great in a pinch.

What follows is the exact recipe for Flora’s Fudge from the vintage comic.  After 50 years of wondering, and a few wild goose chases, I finally tracked down the very comic of my youth on e-Bay. I mistakenly had been hunting for the Sleeping Beauty comic and not The Fairy Godmothers issue. 

Even though I found a posting of the recipe itself on-line, it would not do. I had to have that illustrated rebus in my hands. I had to know if it was really as good and still as hard to stir as I remembered. My imagined solution, then, is to begin with a larger pot to accommodate all the powdered sugar, keep it on the burner at low, and see if this makes a difference in the effort required to combine all the ingredients;

Let’s test my hypothesis.  

4color984fairy-godmothers-b

The Process:

All ingredients assembled. Chocolate selected was 100% Cacao unsweetened chocolate bar by Hershey.

Then I thought that a deep, non-stick  soup pot was a sure bet for handling the large amount of sugar and would prevent any chance of burning. I actually had a roll of wax paper on hand– shades of the fifties when mom wrapped my sandwiches with it for school lunch.

Butter and chocolate melted nicely,  Some panic set in when adding the egg right into the pot– what if it scrambled?  Use a whisk and then spatula and take it off the heat for a moment when adding the egg. Then add vanilla. The liquids kept the mass moving easily.

Then it was time for half of the confectioner’s sugar–  things started to seize up and turn to oatmeal consistency.  A continuous mixing seemed to soften the combination, and it accepted the nuts easily.

Adding the second half of the sugar required patient stirring for it to combine , but the stirring was not sticky or stiff as I remember it.  Everything was sliding around the pan nicely…

So it was time to dump it into the glass dish and ready it for the fridge.

It had only a moderate sheen and did not stick to together the way I remembered it. It came out rather grainy.  Why…..?  In retrospect, I made errors:

1)  I am not sure I would use the same unsweetened chocolate I did.  It was Hersheys.  I chose it because it seemed like what we might have used then, but next time I will try Bakers Chocolate.  It just seemed to not have enough fat or cocoa butter in it.

2) I will not use a non-stick pan. I’m going for my mom’s old Revere Ware. The non-stick pot never seemed to heat up correctly on the sides, it was too wide, and it may have created sugar crystals. I beat the fudge before it cooled sufficiently which affected the crystals.

(So, what we did long ago with my father when we transferred the hot mess to a mixing bowl to add the sugar may have been the right step to take in retrospect.)

3)  I think that I stirred the butter too much. It should just melt into the chocolate on its own to avoid separating the water and fat in it.

The fudge tasted fabulous, but the mouth feel was definitely off.  Why don’t some of you give it a try out there?  OTK would love to know how fabulous was your version of Flora’s Fudge?

~~~~~~~~~~~~~~~~~~~~~~~~~~~~~

FOLLOW UP NOTE:

So 24 hours later, I can say that this first attempt at recreating Flora’s Fudge was a FLOP. But I have not given up and will revisit the recipe in the near future.

Readers out there who know about making candy or working with chocolate might offer up some good advice here. It would be appreciated.

And do let me know,  folks,  if you have tried it, too. The recipe is rather thin on directions, but then again, the comic artists at Disney in1959 were probably not chocolatiers– just Mousketeers.

MOUSEKETEERS6

The Mother of All Mixers: The Sunbeam Mixmaster

17 Comments

The Mother of All Mixers: The Sunbeam Mixmaster

img_3034

     In 1950, my mother was a new housewife with no cooking experience but plenty of will to learn.  Rheta had been exiled from her own mother’s kitchen, never taught to cook. On the eve of her wedding, the story goes, my grandmother Lena’s remark to her was: ”You’re so smart? If you can read, you can cook. Go buy a book.”

My newlywed mother took her mother’s advice along with a wedding gift from my uncles and aunts–  the hottest, do-it-all appliance of the day–  the Sunbeam Mixmaster. In time, she would set up a tasteful pink and gray formica kitchen with a chubby Frigidaire and a pushbutton GE stove to complete the suite of modern appliances.  Her Mixmaster model was the Cadillac version, complete with all the bells and whistles.  Unfortunately, its bells hardly ever rang, and its whistles rarely blew.

“You now have the finest mixer ever made,” said the manual written by the Sunbeam Home Economics department. The accompanying booklet welcomed home cooks to their “family of nearly five million homemakers” who now were, as owners of this extravagant but necessary device, “saving time and arm-work, and enjoying more delicious foods.”  Claims that “the more you use it the more helpful it will become”  would fall flat in my mother’s kitchen.

In those days, my mom’s cooking repertoire was limited. “I was a creative cook,” she asserts today, decades after her Sunbeam Mixmaster was shoved into the back of a cupboard, first in her home and now in mine.  Her efforts in the kitchen consisted mostly of timid experimentation and moderate success with various jello “salads” and “molds”;  however, her one claim to fame among the Wayne Avenue mah jongg-ers was her Orange Chiffon Cake. And the Sunbeam Mixmaster was the reason why.

The Mixmaster’s design is distinctive.  It is streamlined like the fins on a 1950‘s cadillac, and if it had doors, they would close with the same solid Caddy clunk. It sports a grill like that of a Ford truck– and weighs about as much. Shaped like the fuselage of a WW II Spitfire, the old Sunbeam helped my mom to win the dogfight that she faced in the kitchen when it came to Orange Chiffon Cake. (See recipe below.)

With over fourteen pages in the owner’s guide dedicated to multiple attachments, the booklet reads like a plumber’s manual with illustrations of couplings, joints, screws, and washers. An auxiliary motor drives a meat grinder, food chopper, can opener; a potato peeler, juicer, drink mixer, a knife sharpener, and– I kid you not– a silver polisher and buffer. And did I forget the butter churner, bean slicer, and huller for peas?  The homemaker of the 1950’s obviously had lots of time on her hands to use her time-saving appliances.   A miniature hardware store, this entire collection of geegaws constituted an enormous amount of crap that took up space and was just more mechanical stuff to break.  But it was this cumbersome electric mixer which built my mother’s confidence as a baker. While everyone else’s version of chiffon cake was, according to my mom, wet on the bottom and weeping citrus goo as it collapsed upon slicing, hers remained tight, firm, and dry. ( Dry? That was good? )  It was the one thing that came out well in her Mixmaster, she said.

My mother most certainly never read the first cardinal rule of the Mixmaster manual on page four:   “Do not overbeat.”   Since “more is better” was always one of her key cooking principles, the secret to her “success” was clear. If the recipe called for beating eggs whites for 5 minutes, Rheta, I can assure you, with the help of her fancy Sputnik era machine, beat them longer–  well past the glossy-and-stiff stage into the dry-but-not-separated realm.  Then, with her over-folding and over-baking, the fate of the cake was sealed.  Her orange juice laced chiffon cake may have been springy and held its form, but the women in her mah jongg club were more than likely enjoying a tasteless and arid confection which induced immediate thirst.

Today, Rheta has become a much more sophisticated and skilled cook than she ever was as a mother and housewife, and I am proud of her knowledge and interest in good food. But she still has no use for an electric mixer.   At best, she was more of a social baker who took her turn baking for activities at the synagogue, and I do remember enjoying a good many boxed cakes she beat to death in that mixmaster in honor of each of our birthdays.  I have no memory of ever eating her Orange Chiffon cake.

Rheta’s  Mixmaster just celebrated its 64th birthday last week. I take it out from the bowels of my lower cupboards occasionally for a test drive and just for nostalgic reasons. The smell of the overheating electric motor and bakelite finish are both a memory of my youth and a clear indication that the mixer could use a good overhaul and oil change.  In my childhood, I was not allowed to ever use the mixer. I did sneak using it once to make brownies for my Girl Scout troop and ended up with globs of chocolate batter dotting the kitchen cupboards and ceiling. The strenuous clean up and panic of being found out pretty much cured me of my fascination with the mighty mixer. To this day, I prefer whisks, stainless steel bowls, and wooden spoons.

 Happy 64th Birthday to my mother’s Sunbeam Mixmaster!

I don’t even own a KitchenAid stand mixer, though I am tempted to purchase one as a symbol of my foodie status and as a colorful embellishment to my kitchen countertops. (I’ll take pistachio or a burnt orange, thank you.)

The Good Housekeeping Institute boasted in the Mixmaster manual that “…you can’t overwork the Automatic Mixmaster.”  My mother took to heart the advice of the Sunbeam company in her one and only baking achievement.

 ORANGE CHIFFON CAKE

 The following recipe is from about 1956.   While chiffon cakes first appeared in the late 20’s, they became all the rage in the 50’s. Recipes were passed around, and that’s where my mother got her recipe.

 The key to a successful chiffon cake is properly beaten egg whites and a correct ratio of liquid to dry ingredients. Baking in an aluminum tube pan in an even baking oven is also going to give the best result.

INGREDIENTS:

Screen Shot 2013-01-22 at 6.30.50 PM main-qimg-e3f7157c9994355f61b766231006a30d

ABOUT THE EGGS: IMPORTANT

–Separate the yolks form the whites while the eggs are still cold.

–Cover each bowl of yolks and whites with plastic wrap and bring to room temperature (about 30 minutes).

PREHEAT OVEN to 325º and PREPARE PAN, a 10” tube pan UNGREASED.

In your ELECTRIC MIXER:

–place flour, sugar minus 1/4 cup, baking powder, salt, and orange zest and combine.

–Create a well in the center of the flour mixture and add the egg yolks, oil, orange juice, and vanilla extract and beat until smooth (about a minute). Scrape the sides of the bowl during beating.

In a CLEAN, GREASE-FREE, SEPARATE BOWL in your ELECTRIC MIXER:

–Beat the egg whites until foamy. Then add the cream of tartar.

–Continue beating until soft peaks form.

–Beat in, gradually, the remaining 1/4 cup of sugar, until STIFF PEAKS form. (You should be able to invert the mixing bowl and the egg whites will not slip out).

–Then FOLD the beaten egg whites into the first batter gently using a LARGE RUBBER SPATULA.  Fold until just blended. Avoid deflating the batter.

POUR BATTER INTO THE UNGREASED TUBE PAN:

–Lightly drop the filled pan onto the counter to release air bubbles..

–Bake for 55 to 60 minutes, or until knife or toothpick inserted comes out clean.The cake should spring back upon light compression.

–Remove cake from oven and cool UPSIDE DOWN. (You can suspend the pan on a bottle).

–Cake must COOL COMPLETELY before removing it from pan (1-1/2 hours).

After removing the cake from the pan using a spatula run along the edges, set it on a rack and dust with confectioner’s sugar or drizzle an orange flavored glaze on top.  Serve with ice cream or whipped cream. 

Kitchen Forkup: Fermented Foods

Leave a comment

Kirsten Mortensen Says:

Okay, I’ll go!!!

Yesterday evening I threw out a gigantic pile of sliced cabbage that was supposed to have turned into sauerkraut . . . not sure what happened but after 10 days it still wasn’t sour . . . not even particularly acidic. I may have over-salted . . .

I admire your effort here, Kirsten. Eating fermented foods is getting a lot of praise recently: lactic acid-fermentation like this breaks down the carbohydrates in the cabbage and is supposed help digestion as well as fight cancer. And sauerkraut is loaded with nutrients, calcium being one of them. (Ladies– take note. Eat pickled cabbage for strong bones!)

This happened to me once with quarts and quarts of sour pickles. I had to toss most of my cucumber harvest. Heartbreaking. Why? I didn’t rinse/pat them dry after the salting stage– the long, kosher-salted slices must sit in a large bowl with a plate or weight on top and “weep” out their liquid, and I failed to rinse and dry.

So you may be right about too much salt. Or too much liquid. What kind of salt did you use? Kosher or pickling salt is really required.

Was this “raw” pickled sauerkraut, or the old traditional cooked recipe? Did you add whey? Pound it? Was it supposed to sit for 2 weeks, 3 days, or was this a quick preparation that was ready in a few hours? I’d love to see the recipe.

Moisture, amount of oxygen, and temperature are all important factors in determining the outcome. For a great scientific explanation of how sauerkraut ferments, see:
http://www.nourishingtreasures.com/index.php/2012/05/15/the-science-behind-sauerkraut-fermentation/
(scroll down page)